
.svg?fit=max&auto=format&n=NwcmN3Uz2rKt7z_Z&q=85&s=5062a9f3b73c4eb9710e4e28d530d3dd)
Create a future demand planning scenario
Use a scenario to bring together one or multiple trade and marketing events. On the demand planning page, click + Add New Scenario.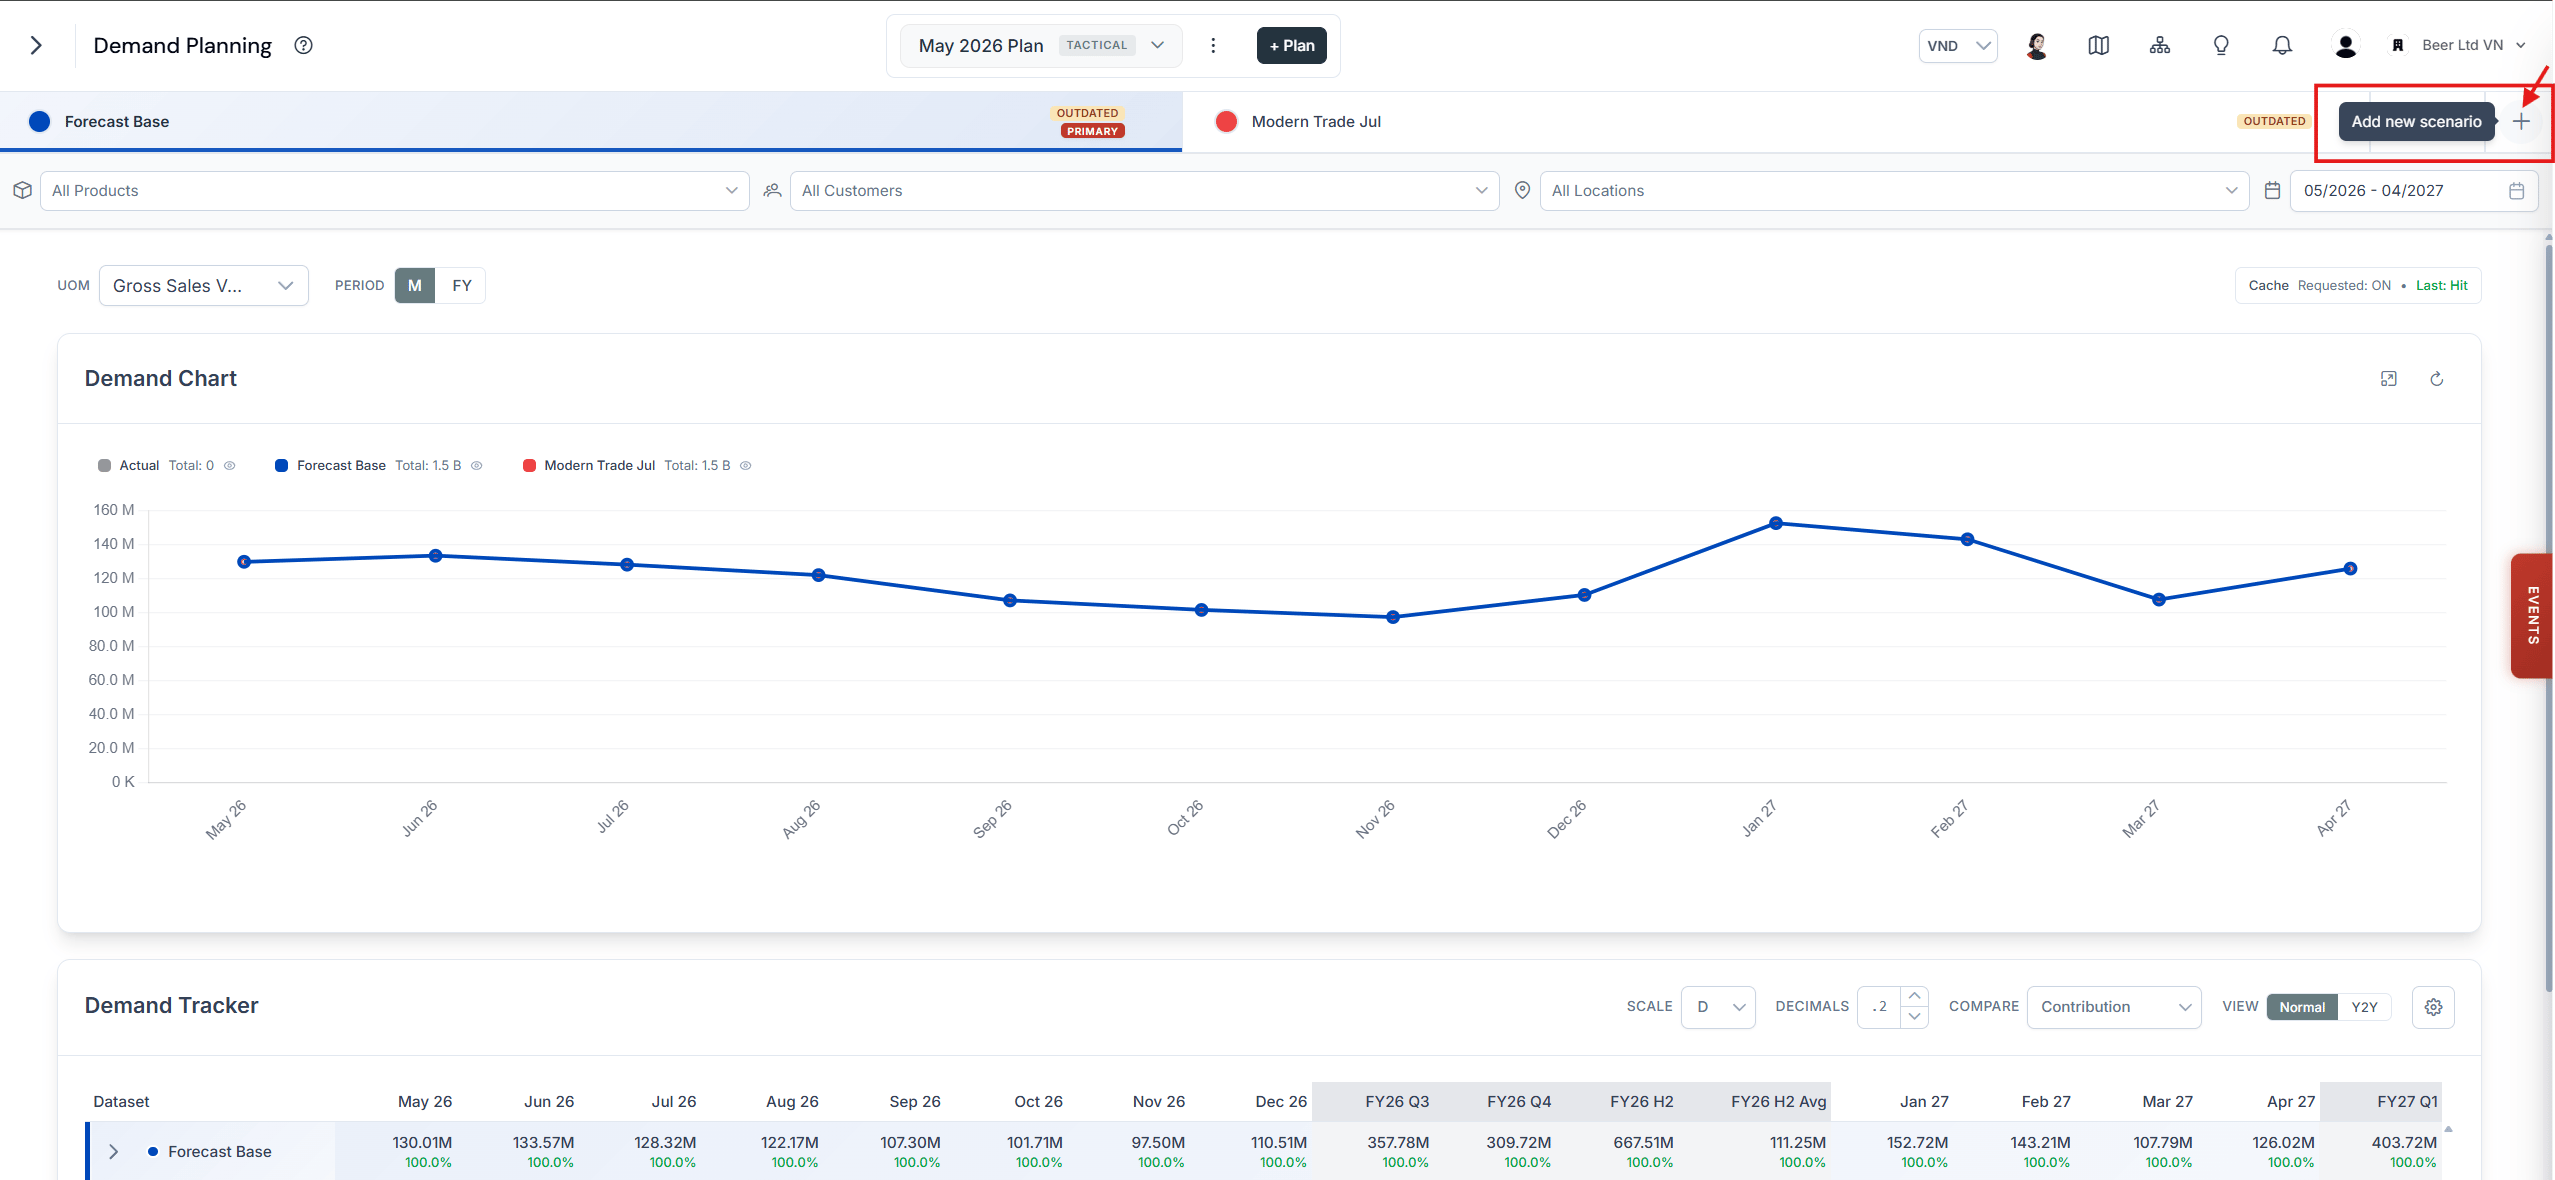
Adding a new scenario from the demand planning page
1
Name the scenario
Give the scenario a name that describes the plan you are modelling.
2
Select the supply plan
Choose the supply plan the scenario runs against.
3
Select the event version
Choose the demand event version whose impacts the scenario should include.
4
Save
Click Save to create the scenario.
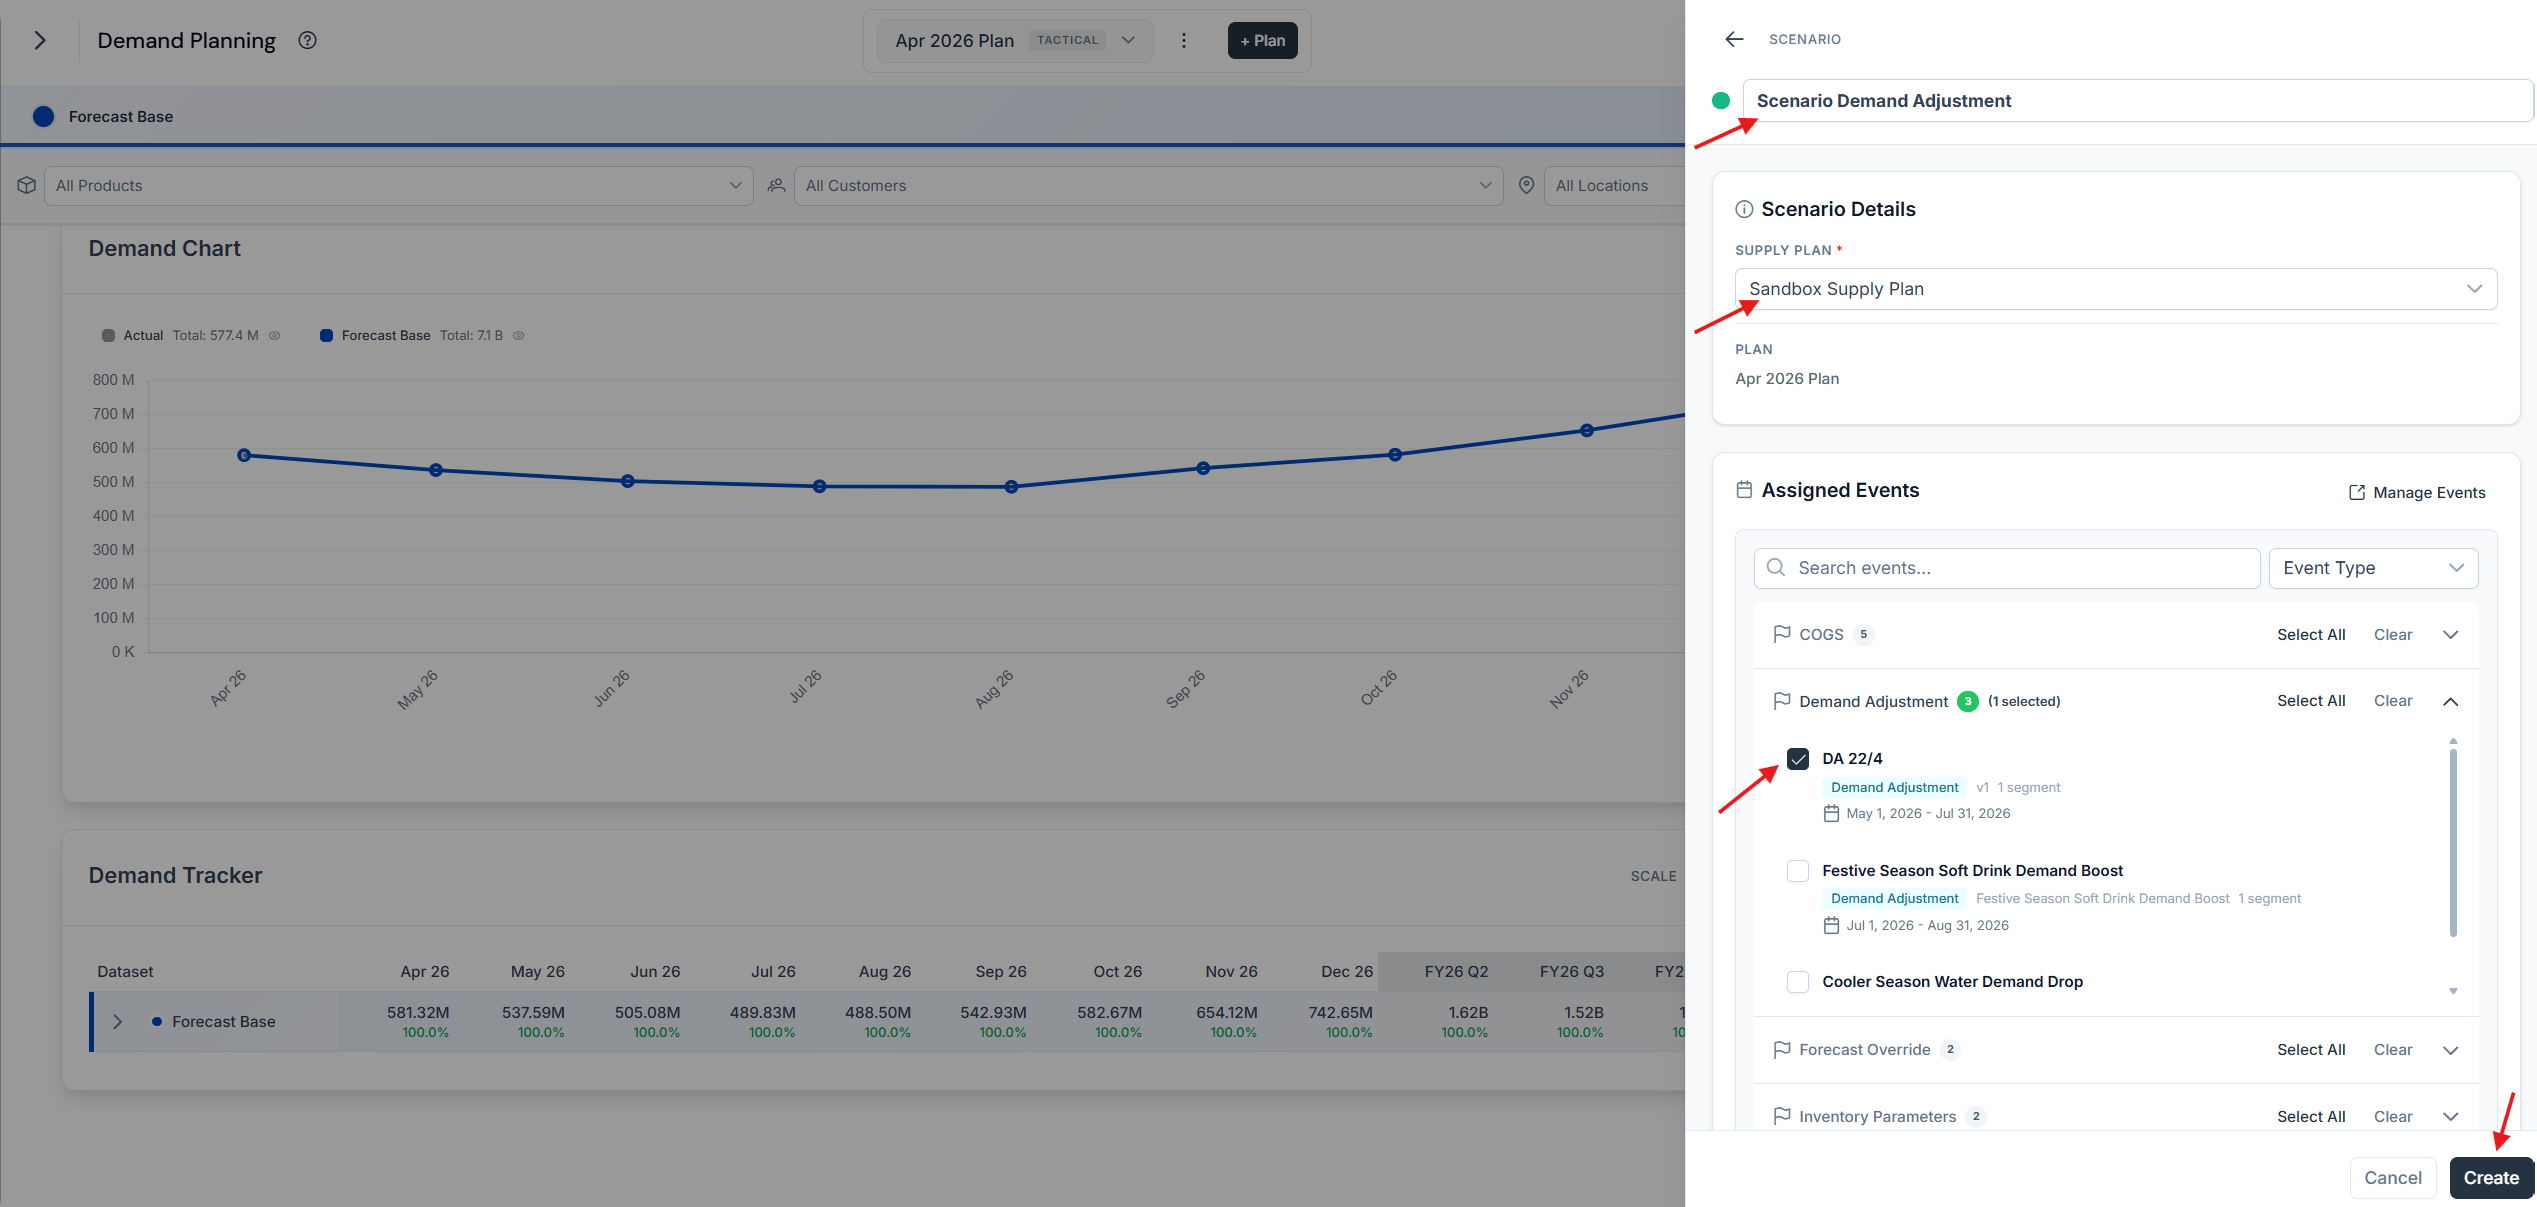
The new scenario dialog with name, supply plan, and event version
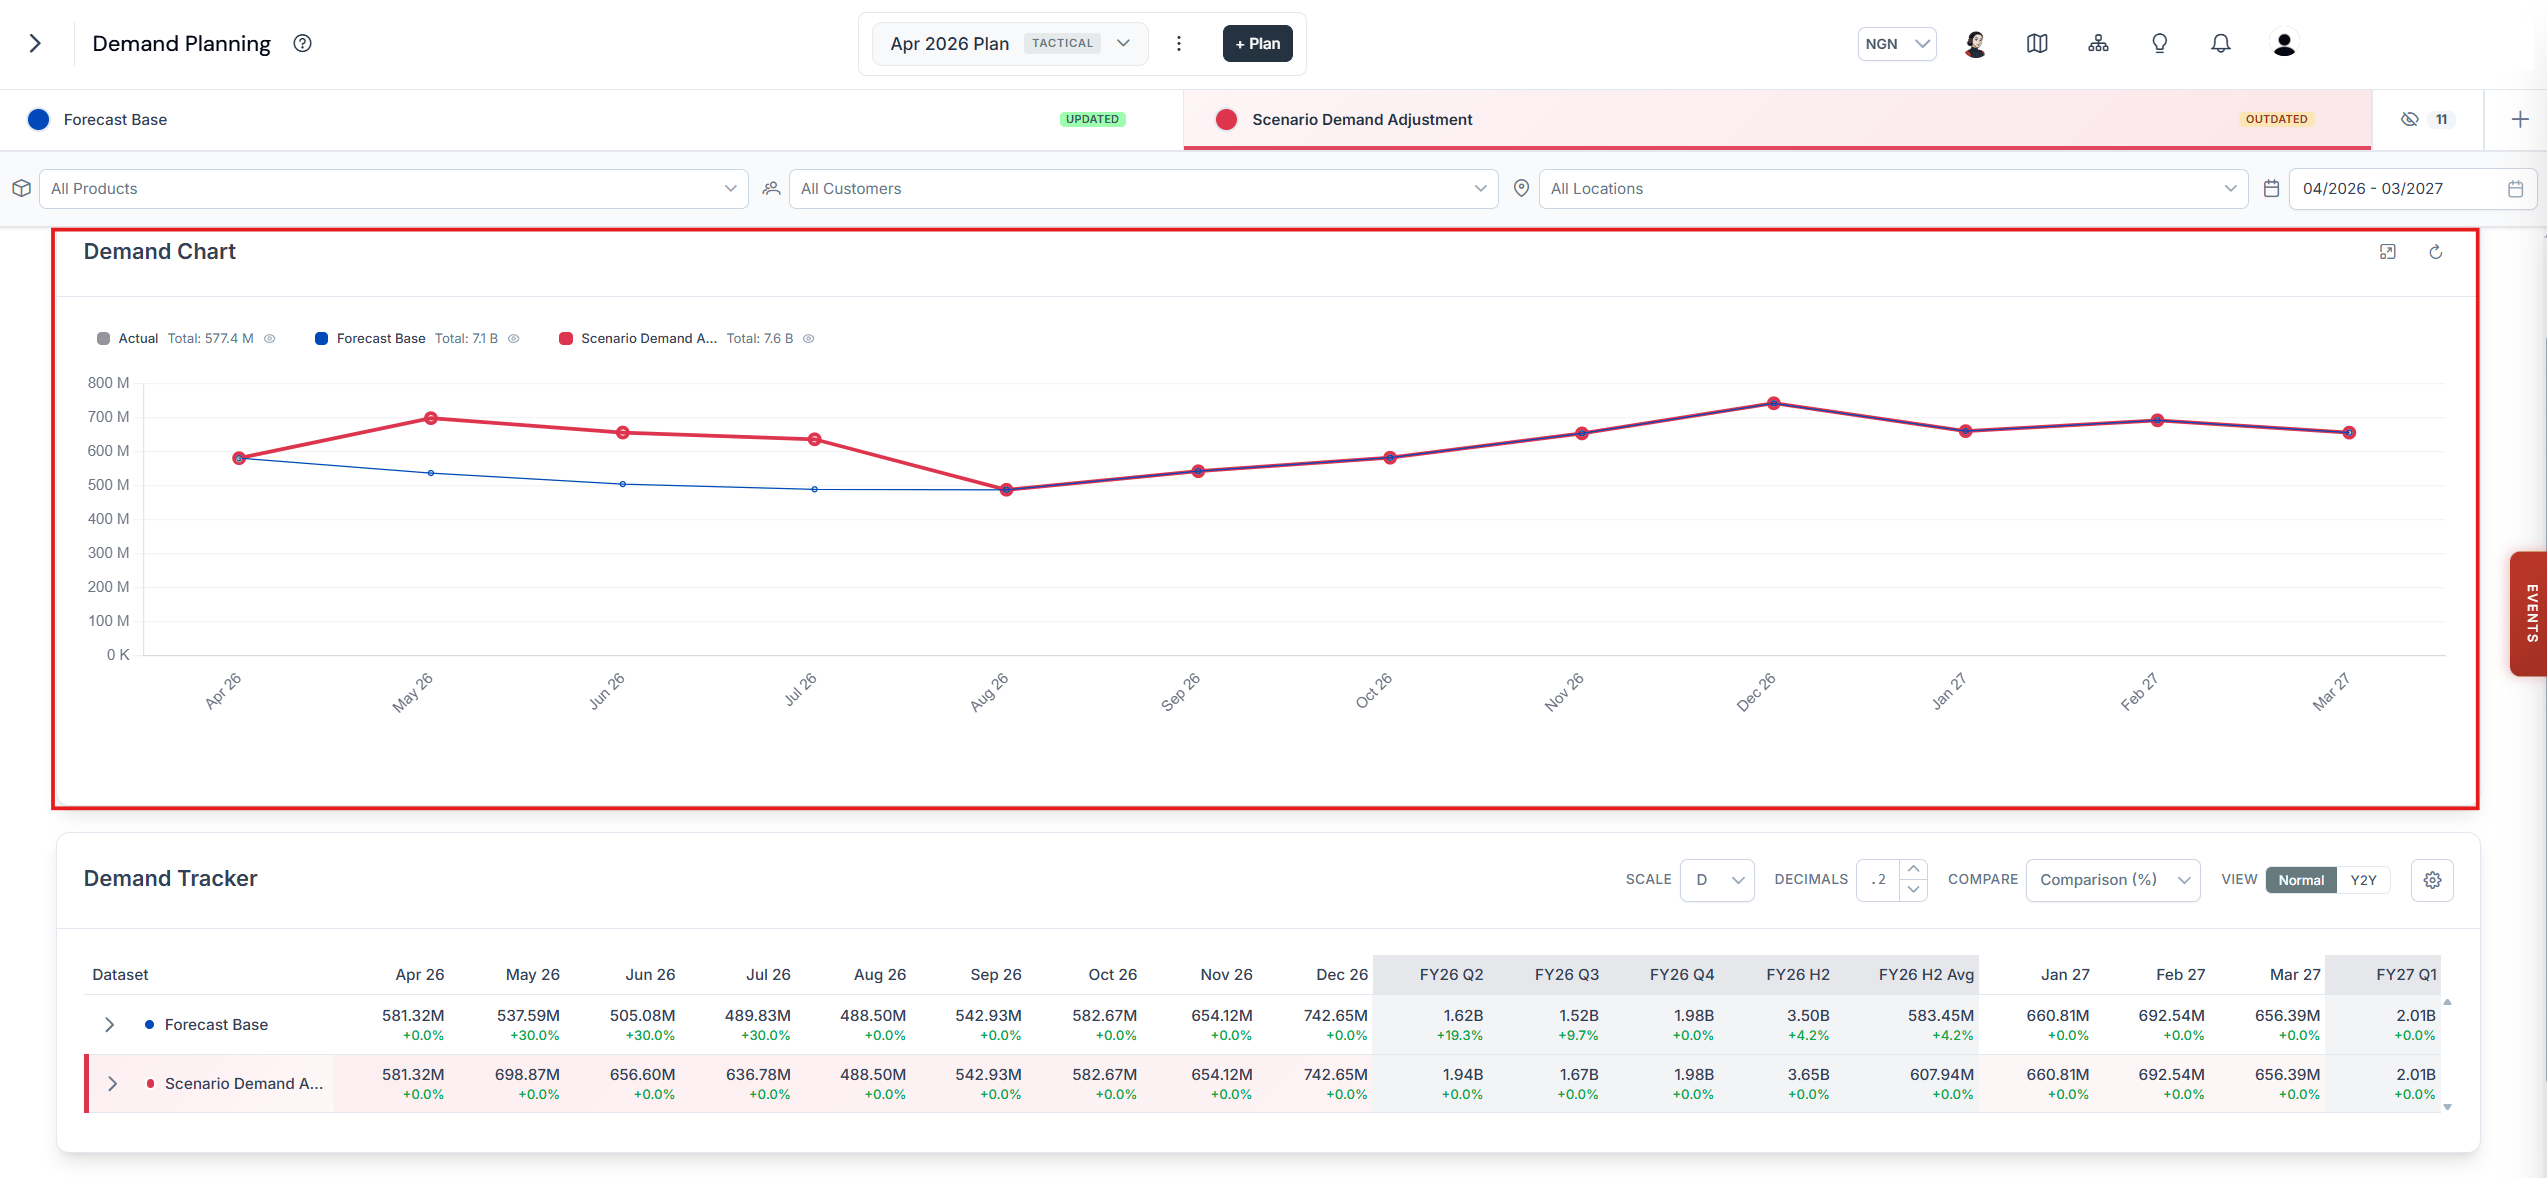
Scenario demand reflecting the selected events
Select a scenario as the primary scenario
Making a scenario primary converts it into the plan that the entire business uses as its reference.
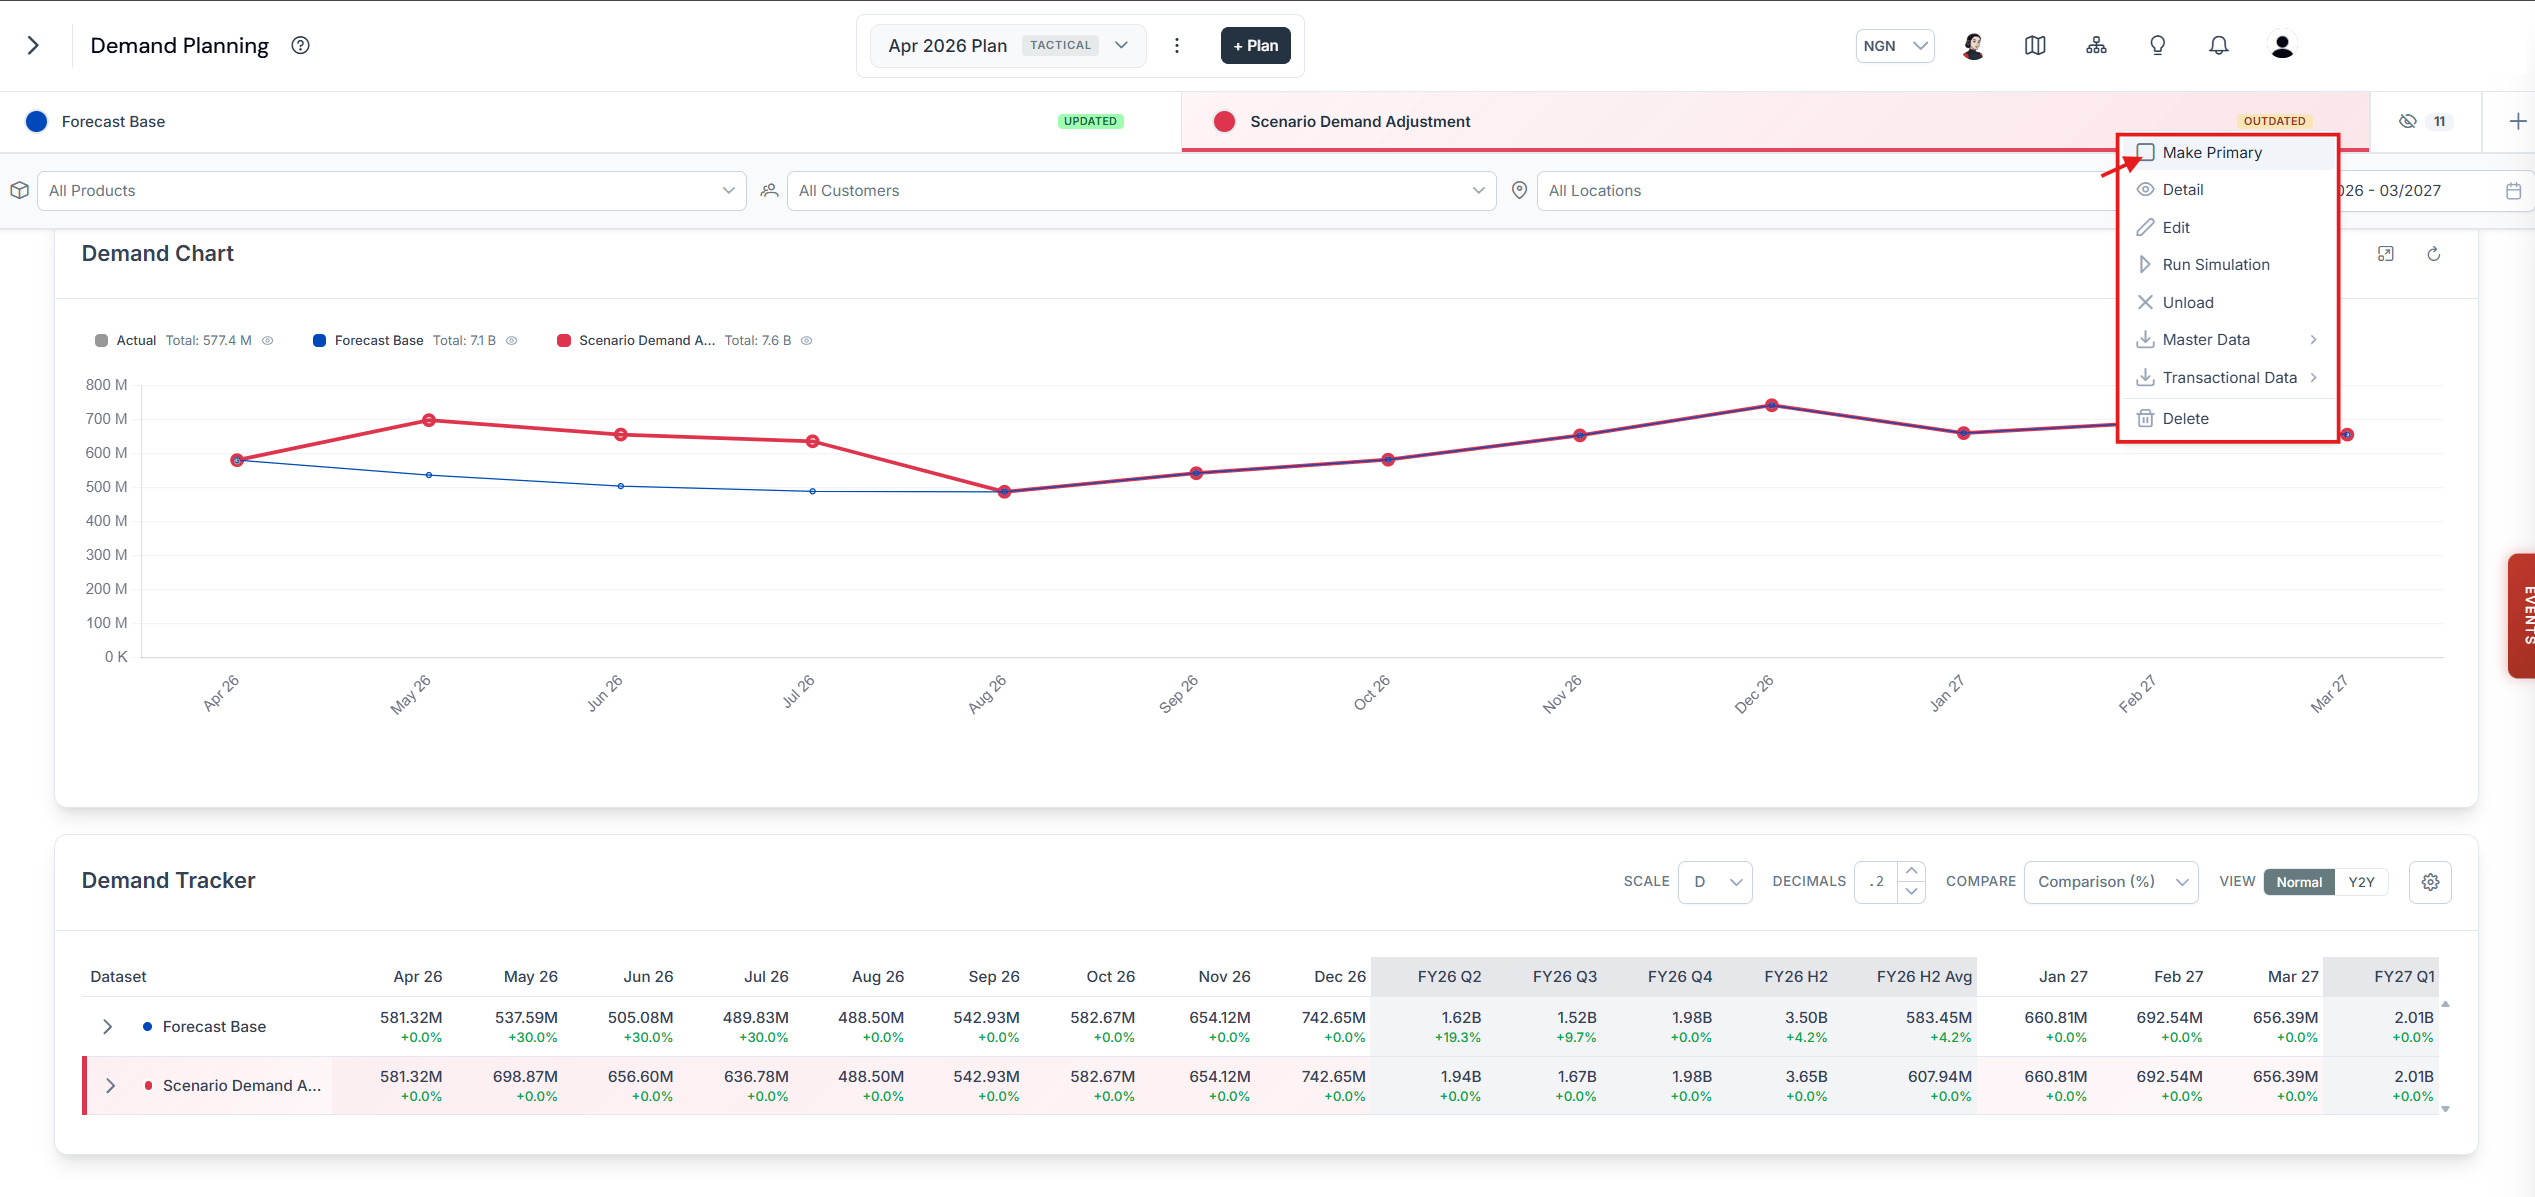
Selecting Make Primary from the scenario menu
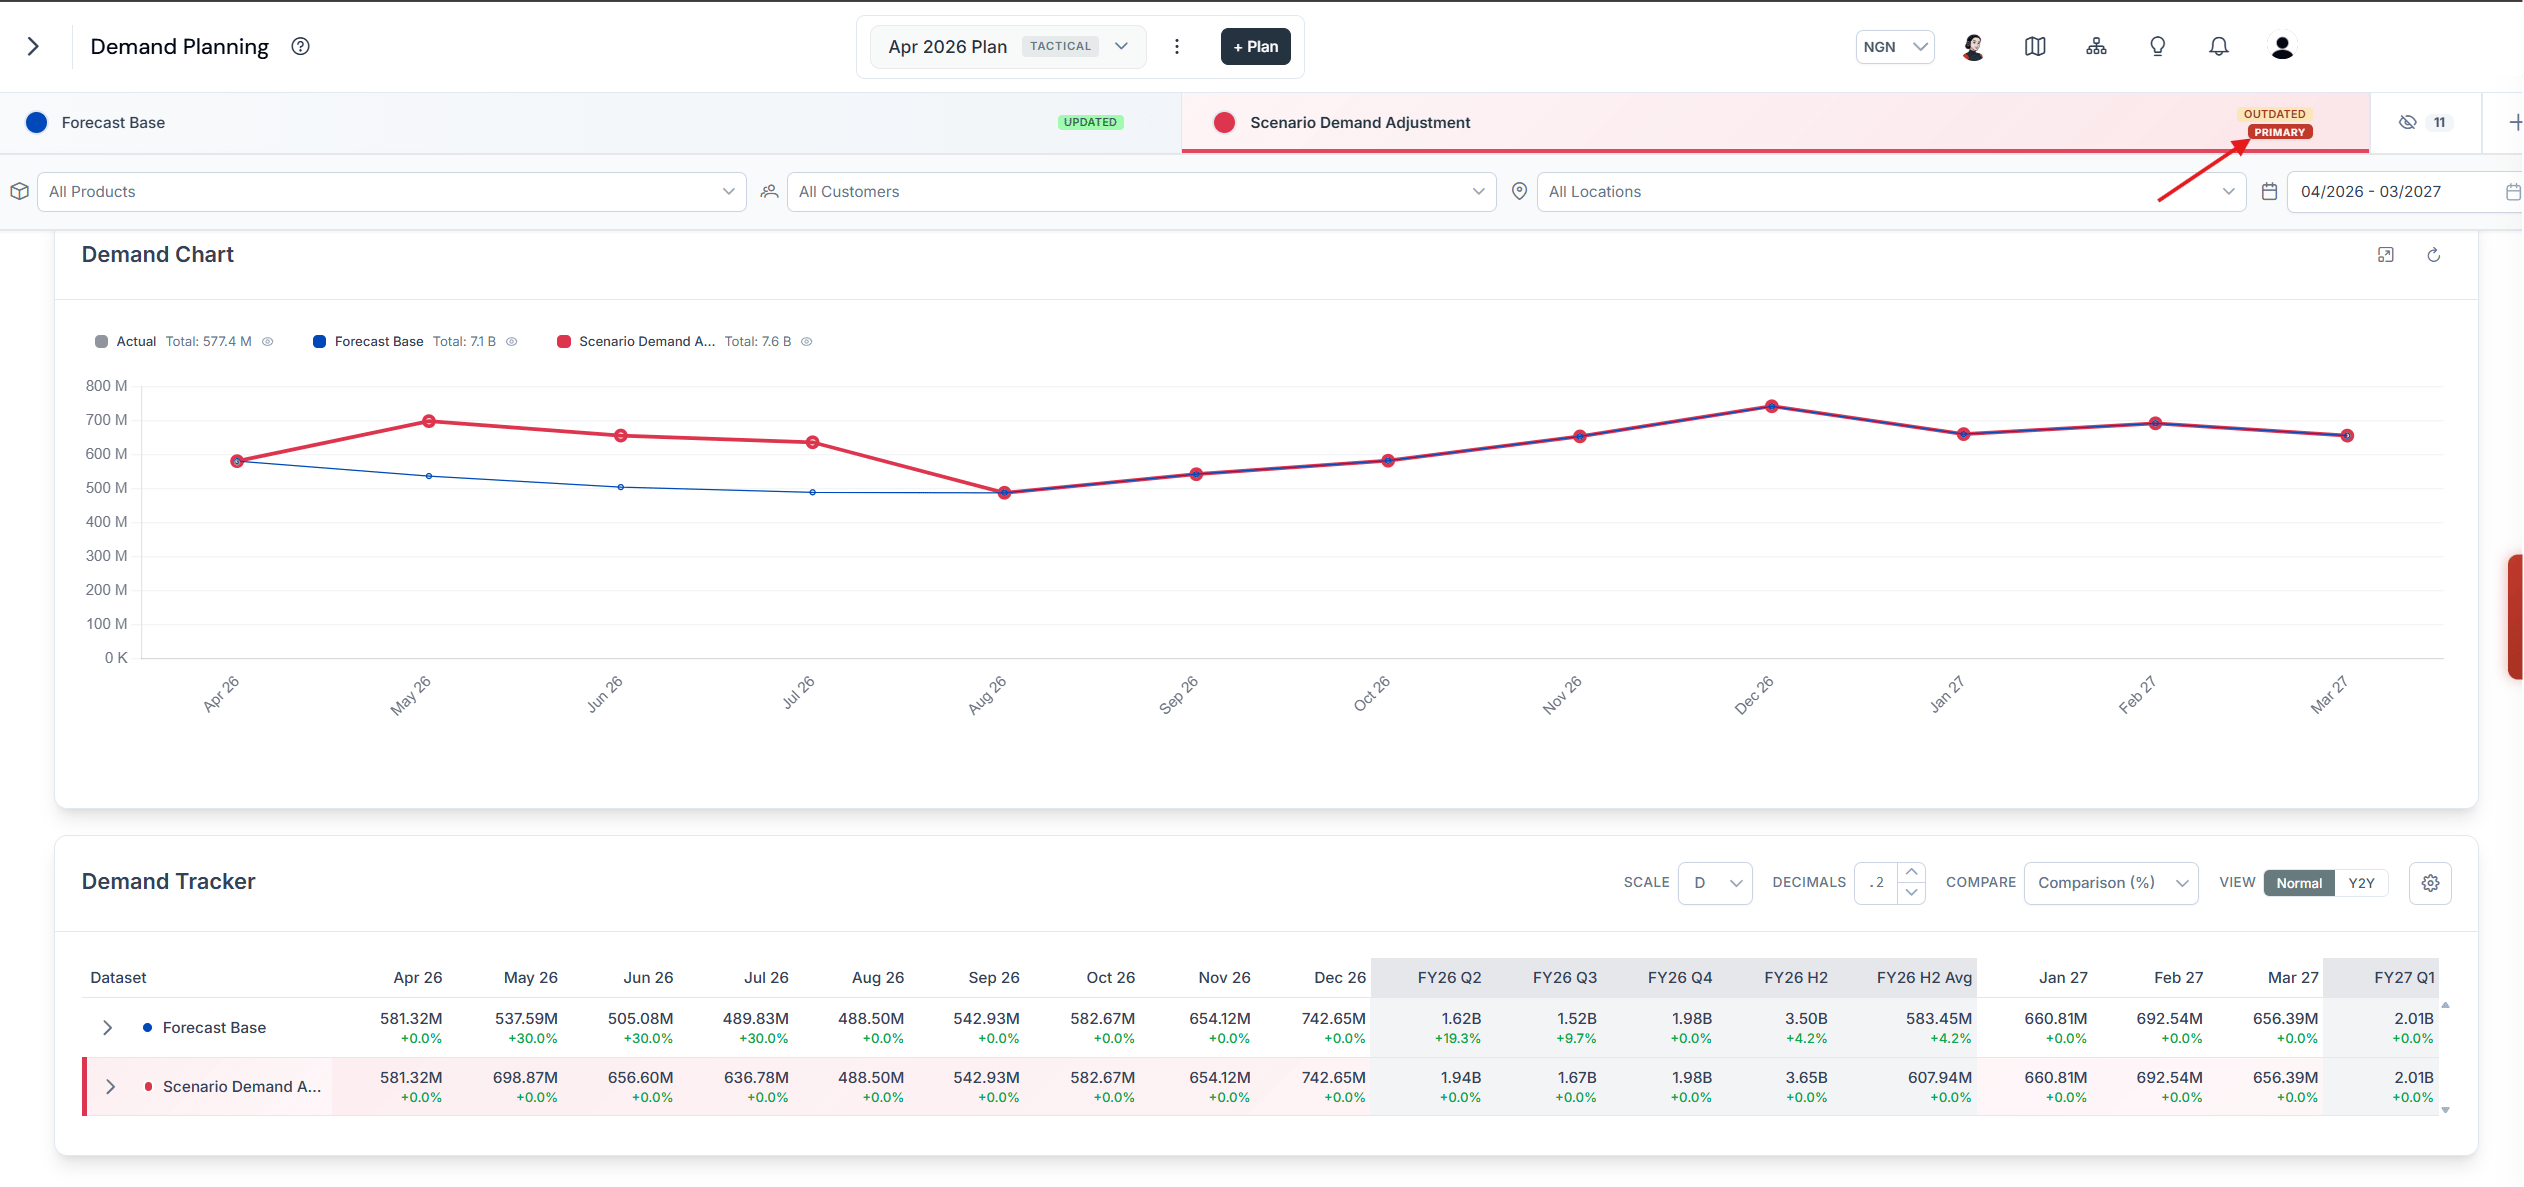
The Primary symbol on the promoted scenario