Definitions

Tactical plan

In supply chain management, a tactical plan is a medium-term plan that outlines the actions and strategies used to achieve the organization’s overall supply chain goals and objectives. Tactical planning typically covers a time frame of six months to two years, and it focuses on implementing the strategic plan. In SIMCEL, it refers to the plans that are created regularly (weekly, monthly, and so on) and that are used to create the committed plan.
Beyond the tactical plan, SIMCEL also features a Budget Plan, or strategic plan, aimed at setting broad business goals across 2 to 5 years and focusing on key areas like brand, channels, and regions.

Creating a new tactical plan

Click + Plan to open the SIMCEL plan menu.
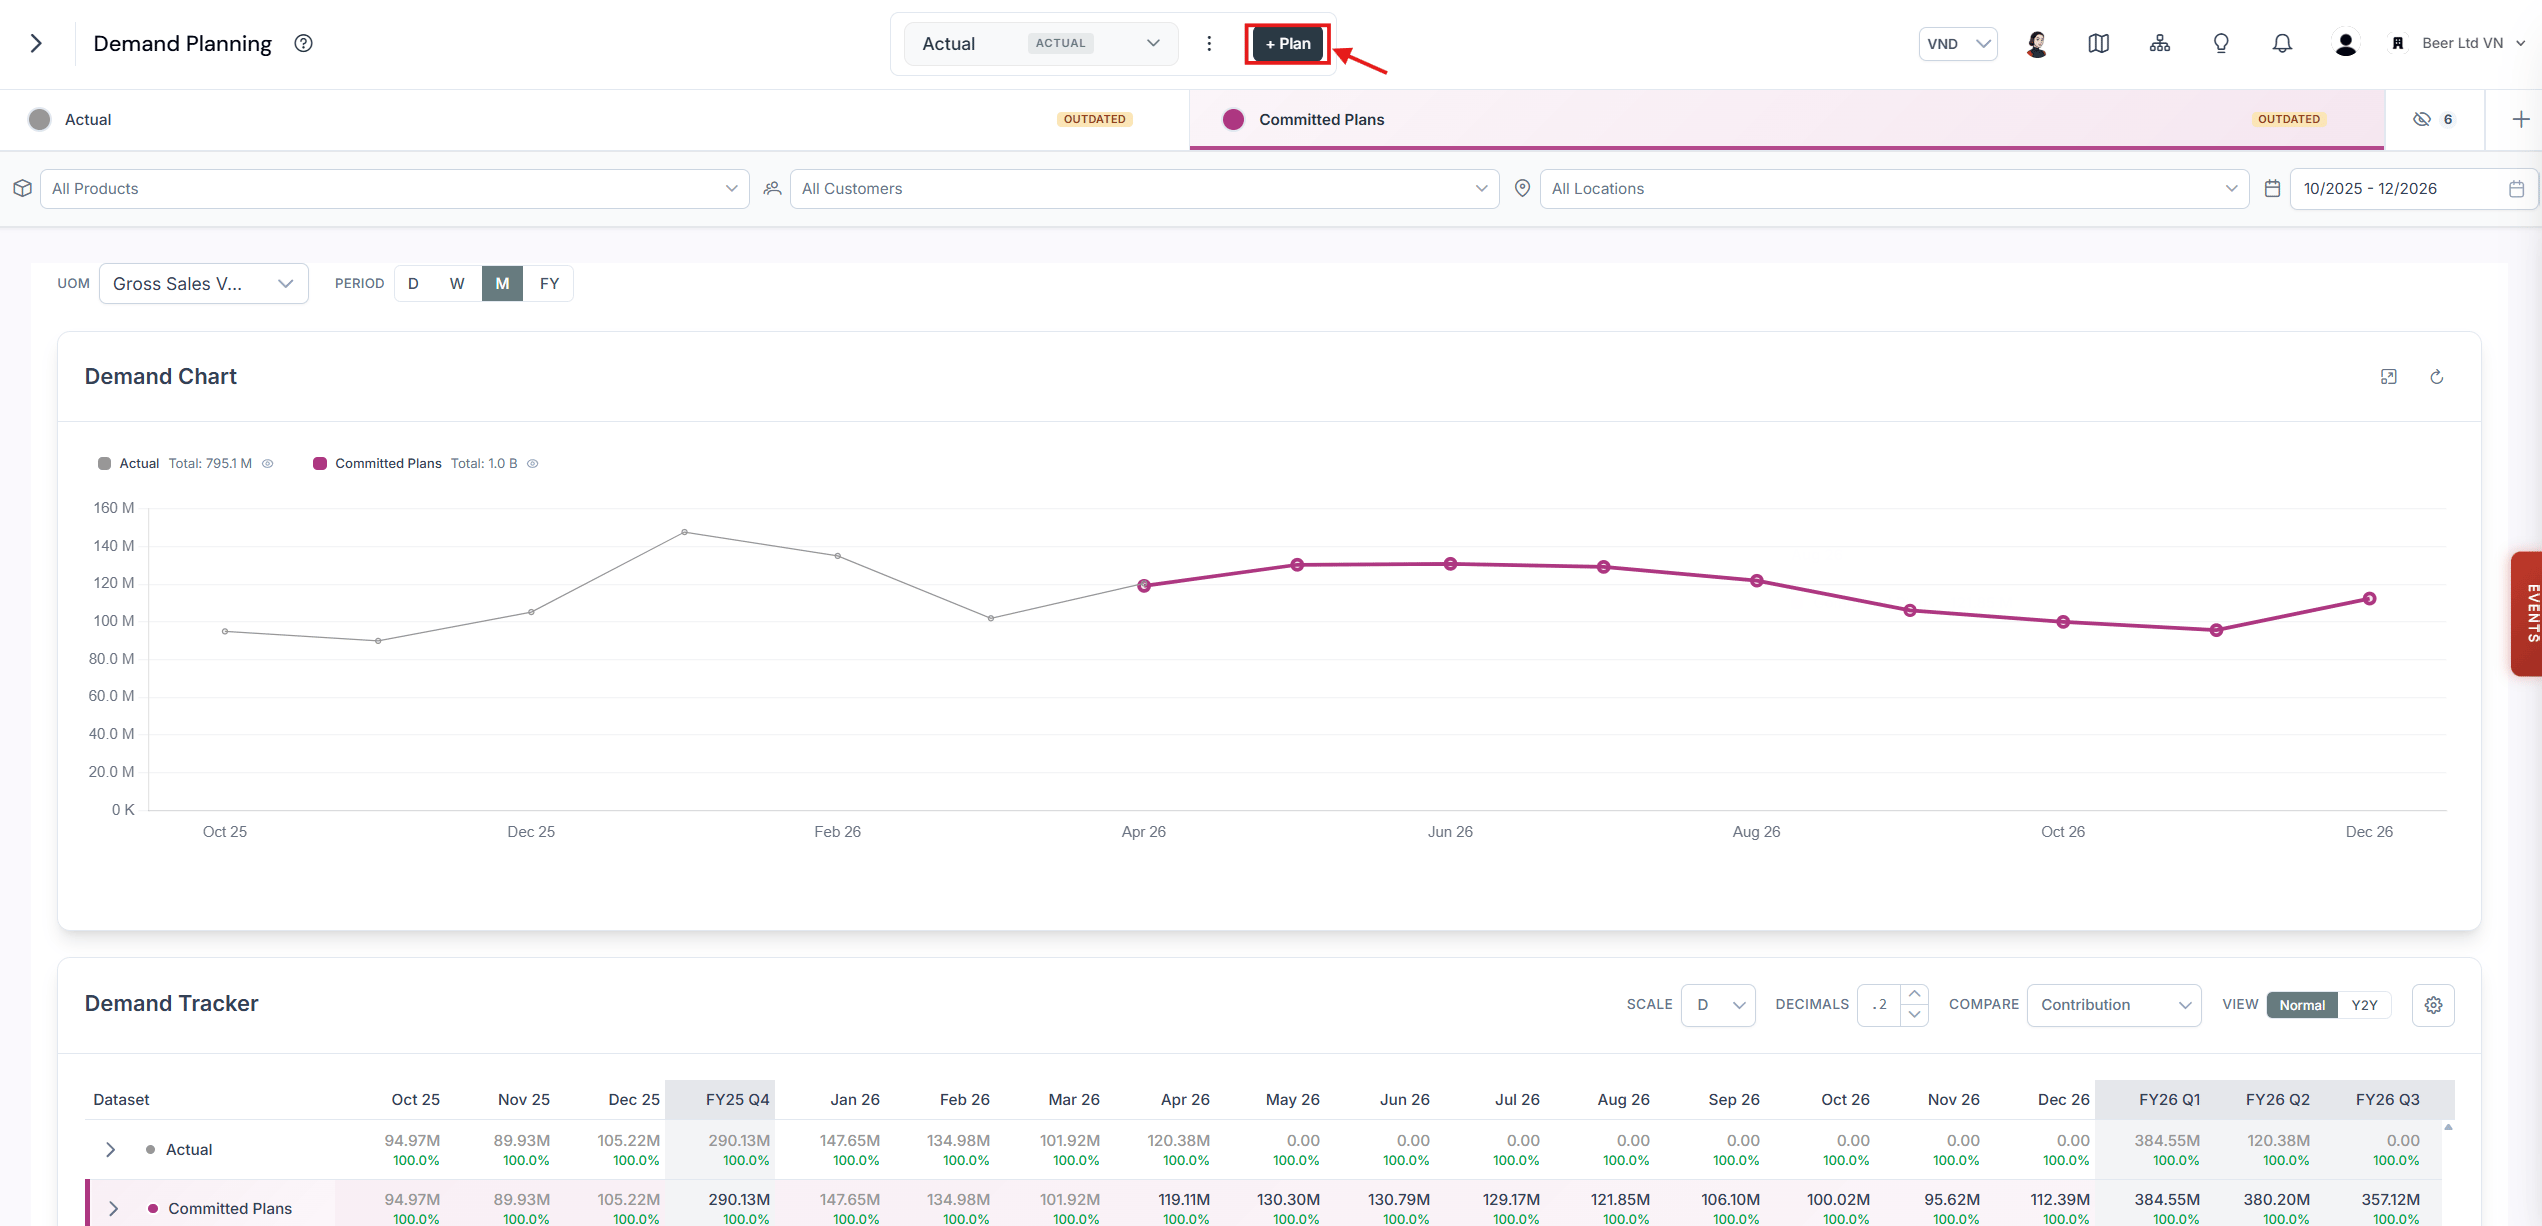
SIMCEL toolbar with the + Plan button highlighted, opening the plan creation menu

The + Plan button opens the SIMCEL plan menu

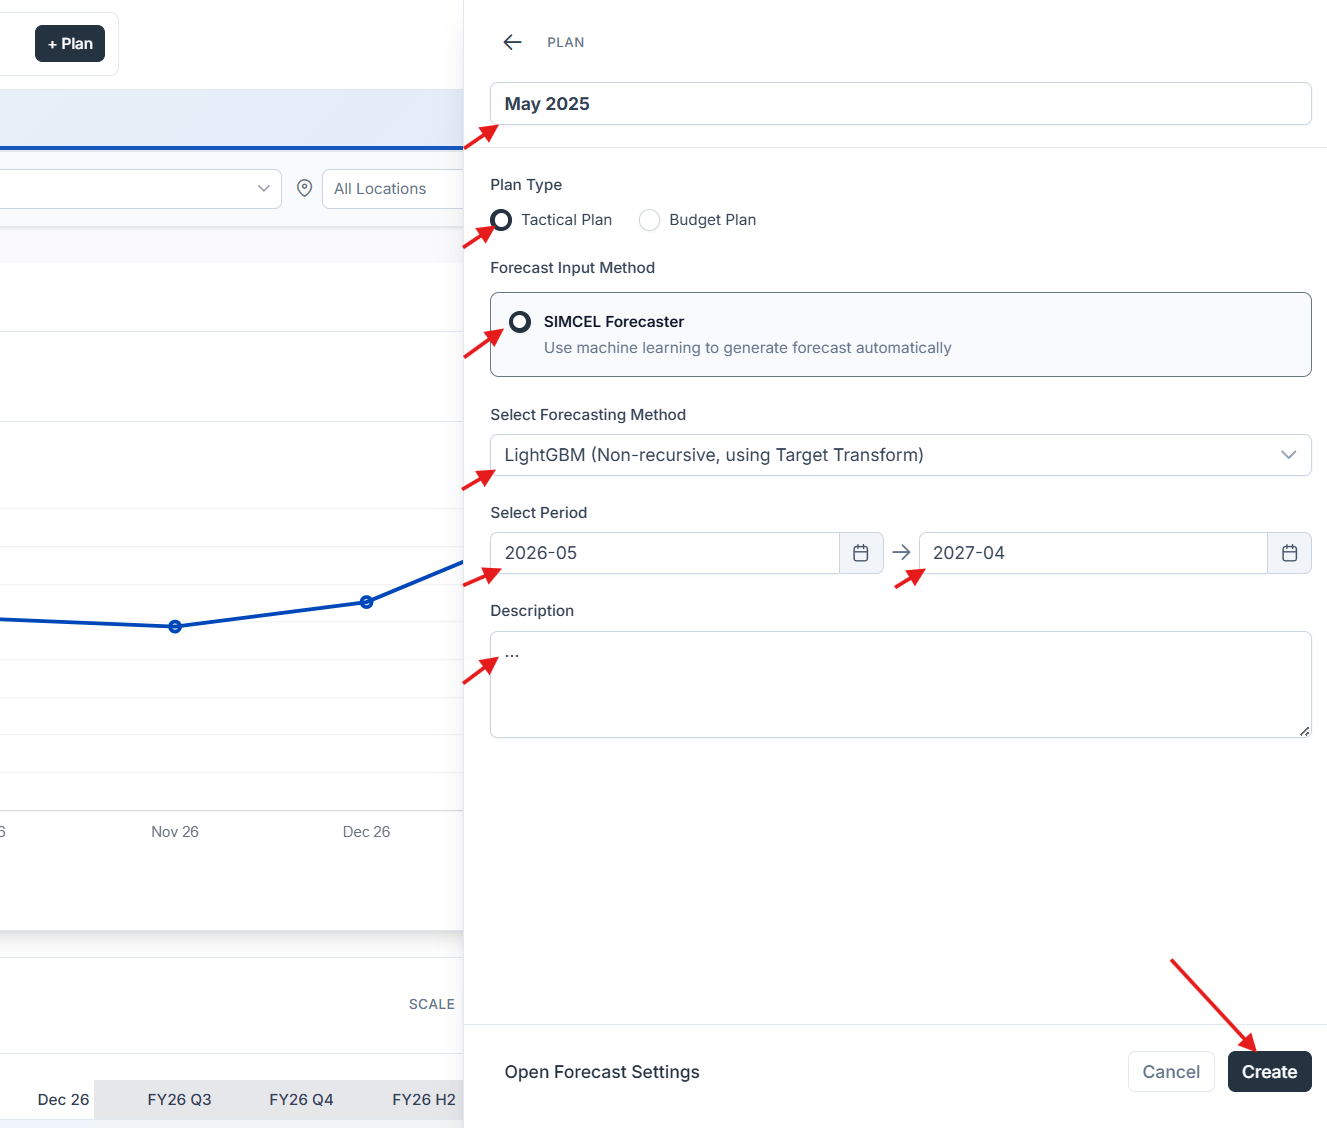
To create a new tactical plan, for example a plan for February 2026:
1

Set the plan title

Set the title of the plan to Feb 2026.
2

Select the plan type

Select Tactical plan.
3

Select the forecasting method

Select the forecasting method. You can try the Light Gradient-Boosting Machine (LightGBM) method.
4

Select the plan period

Set the Plan Period to Feb 2026 - Jan 2027.
5

Add a description

Add a description. This is optional.
6

Create the plan

Click Create.
New plan dialog with the title Feb 2026, the Tactical plan type selected, the LightGBM forecasting method, and a plan period of February 2026 to January 2027

Configuring a new tactical plan

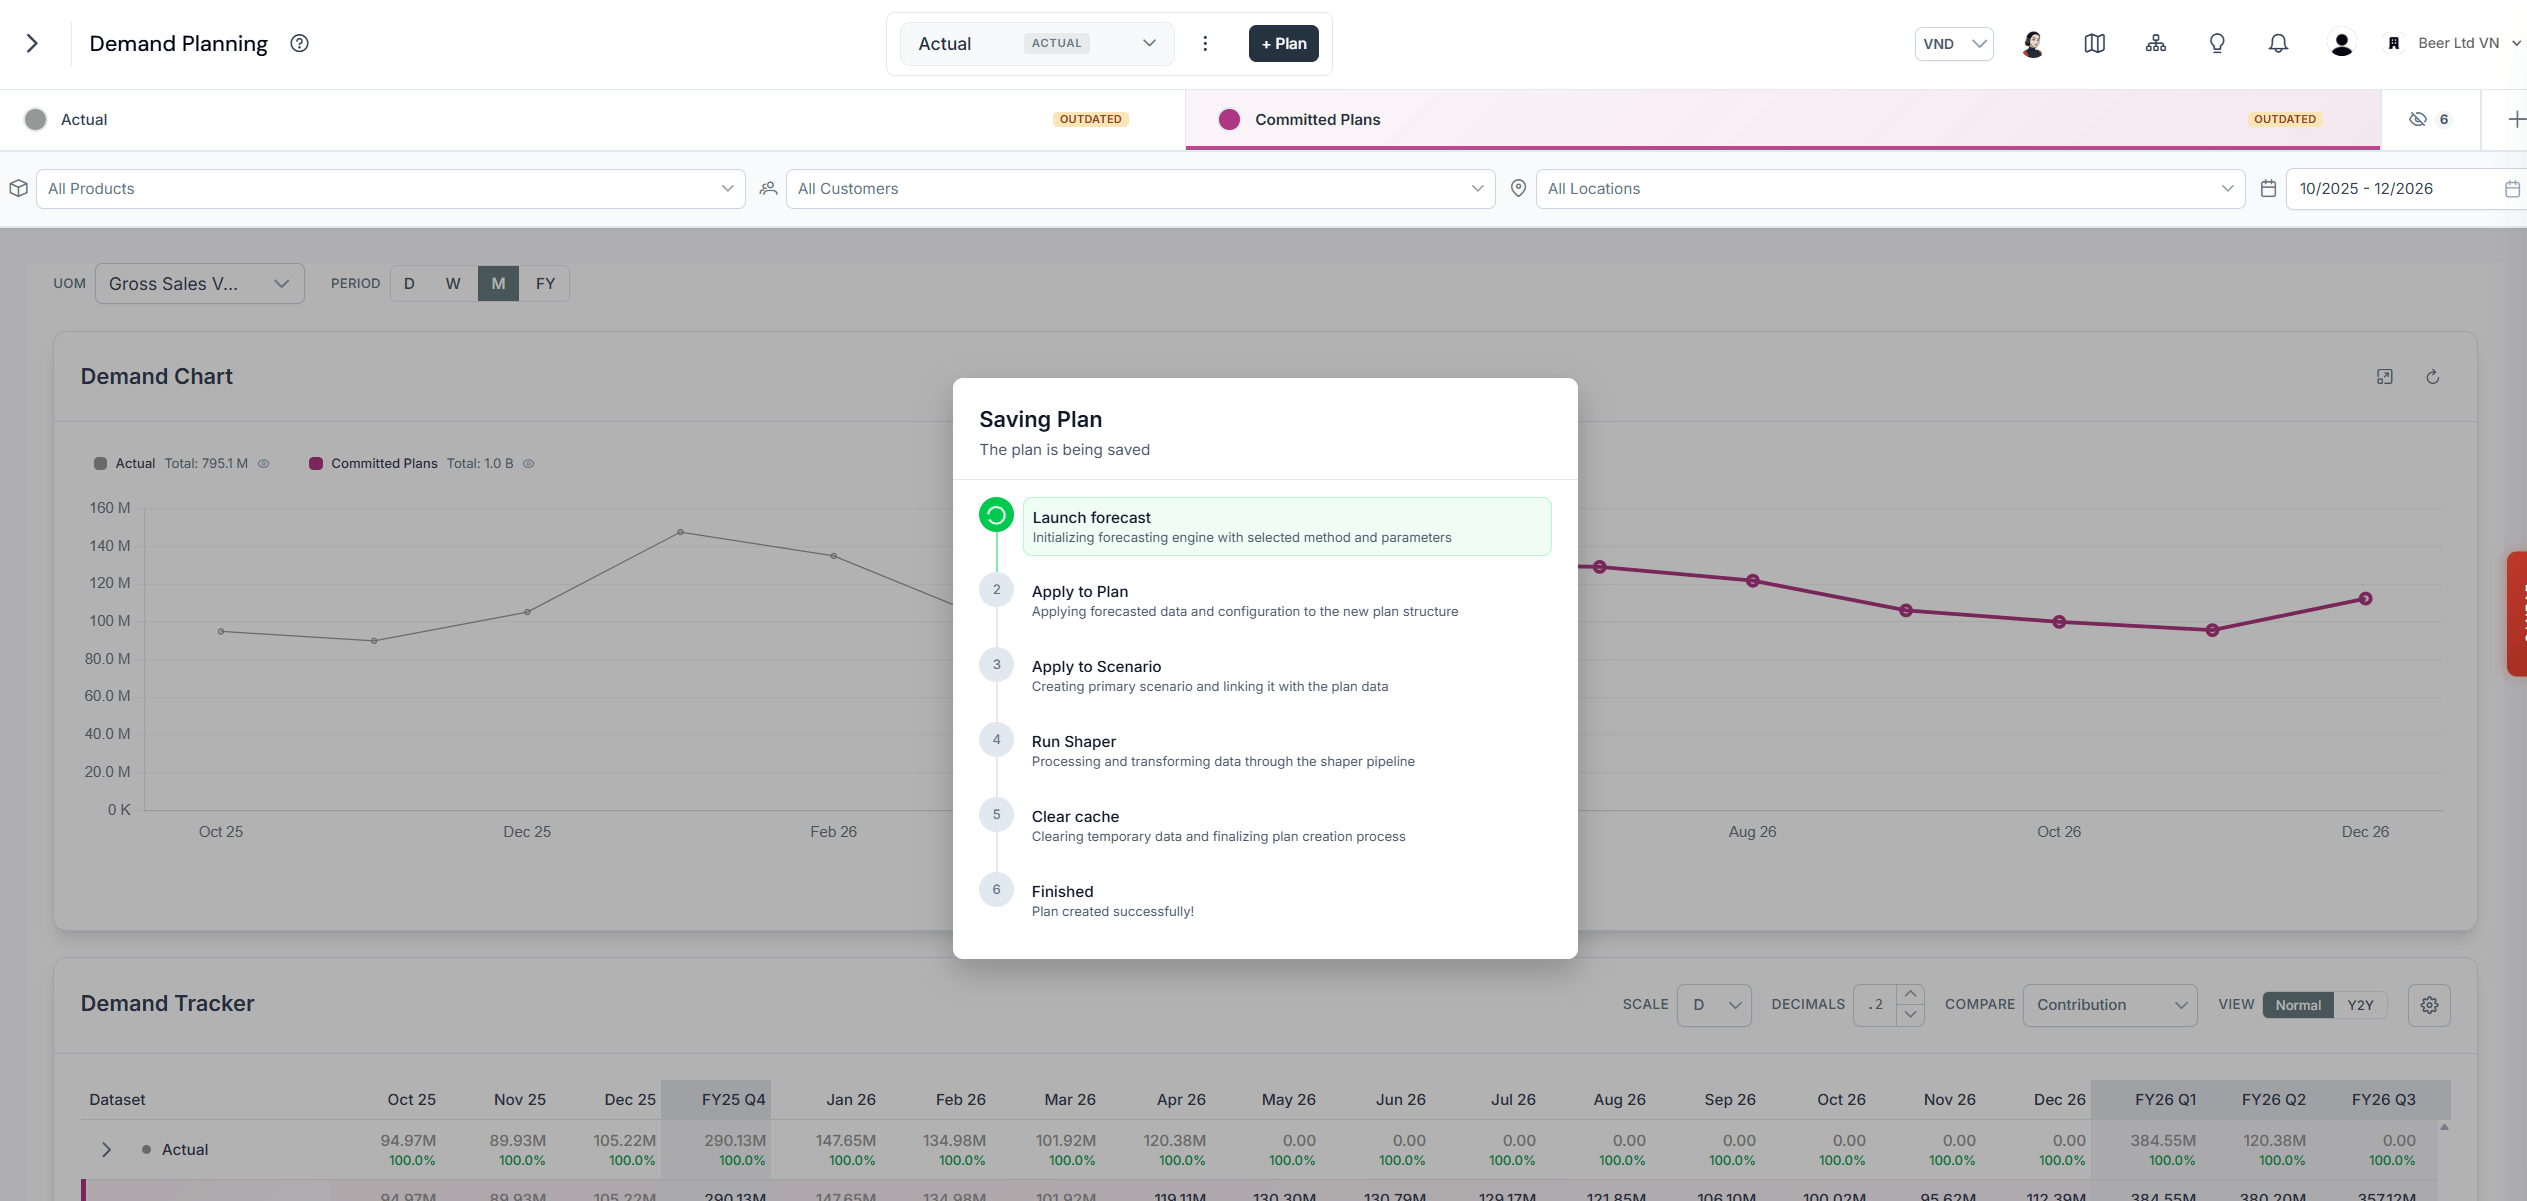
The screen shows a loading page while the forecaster generates the demand projection for the new plan. This may take a few minutes.
Loading screen shown while SIMCEL's forecaster generates the demand projection for the newly created plan

The forecaster generating the demand projection for the new plan
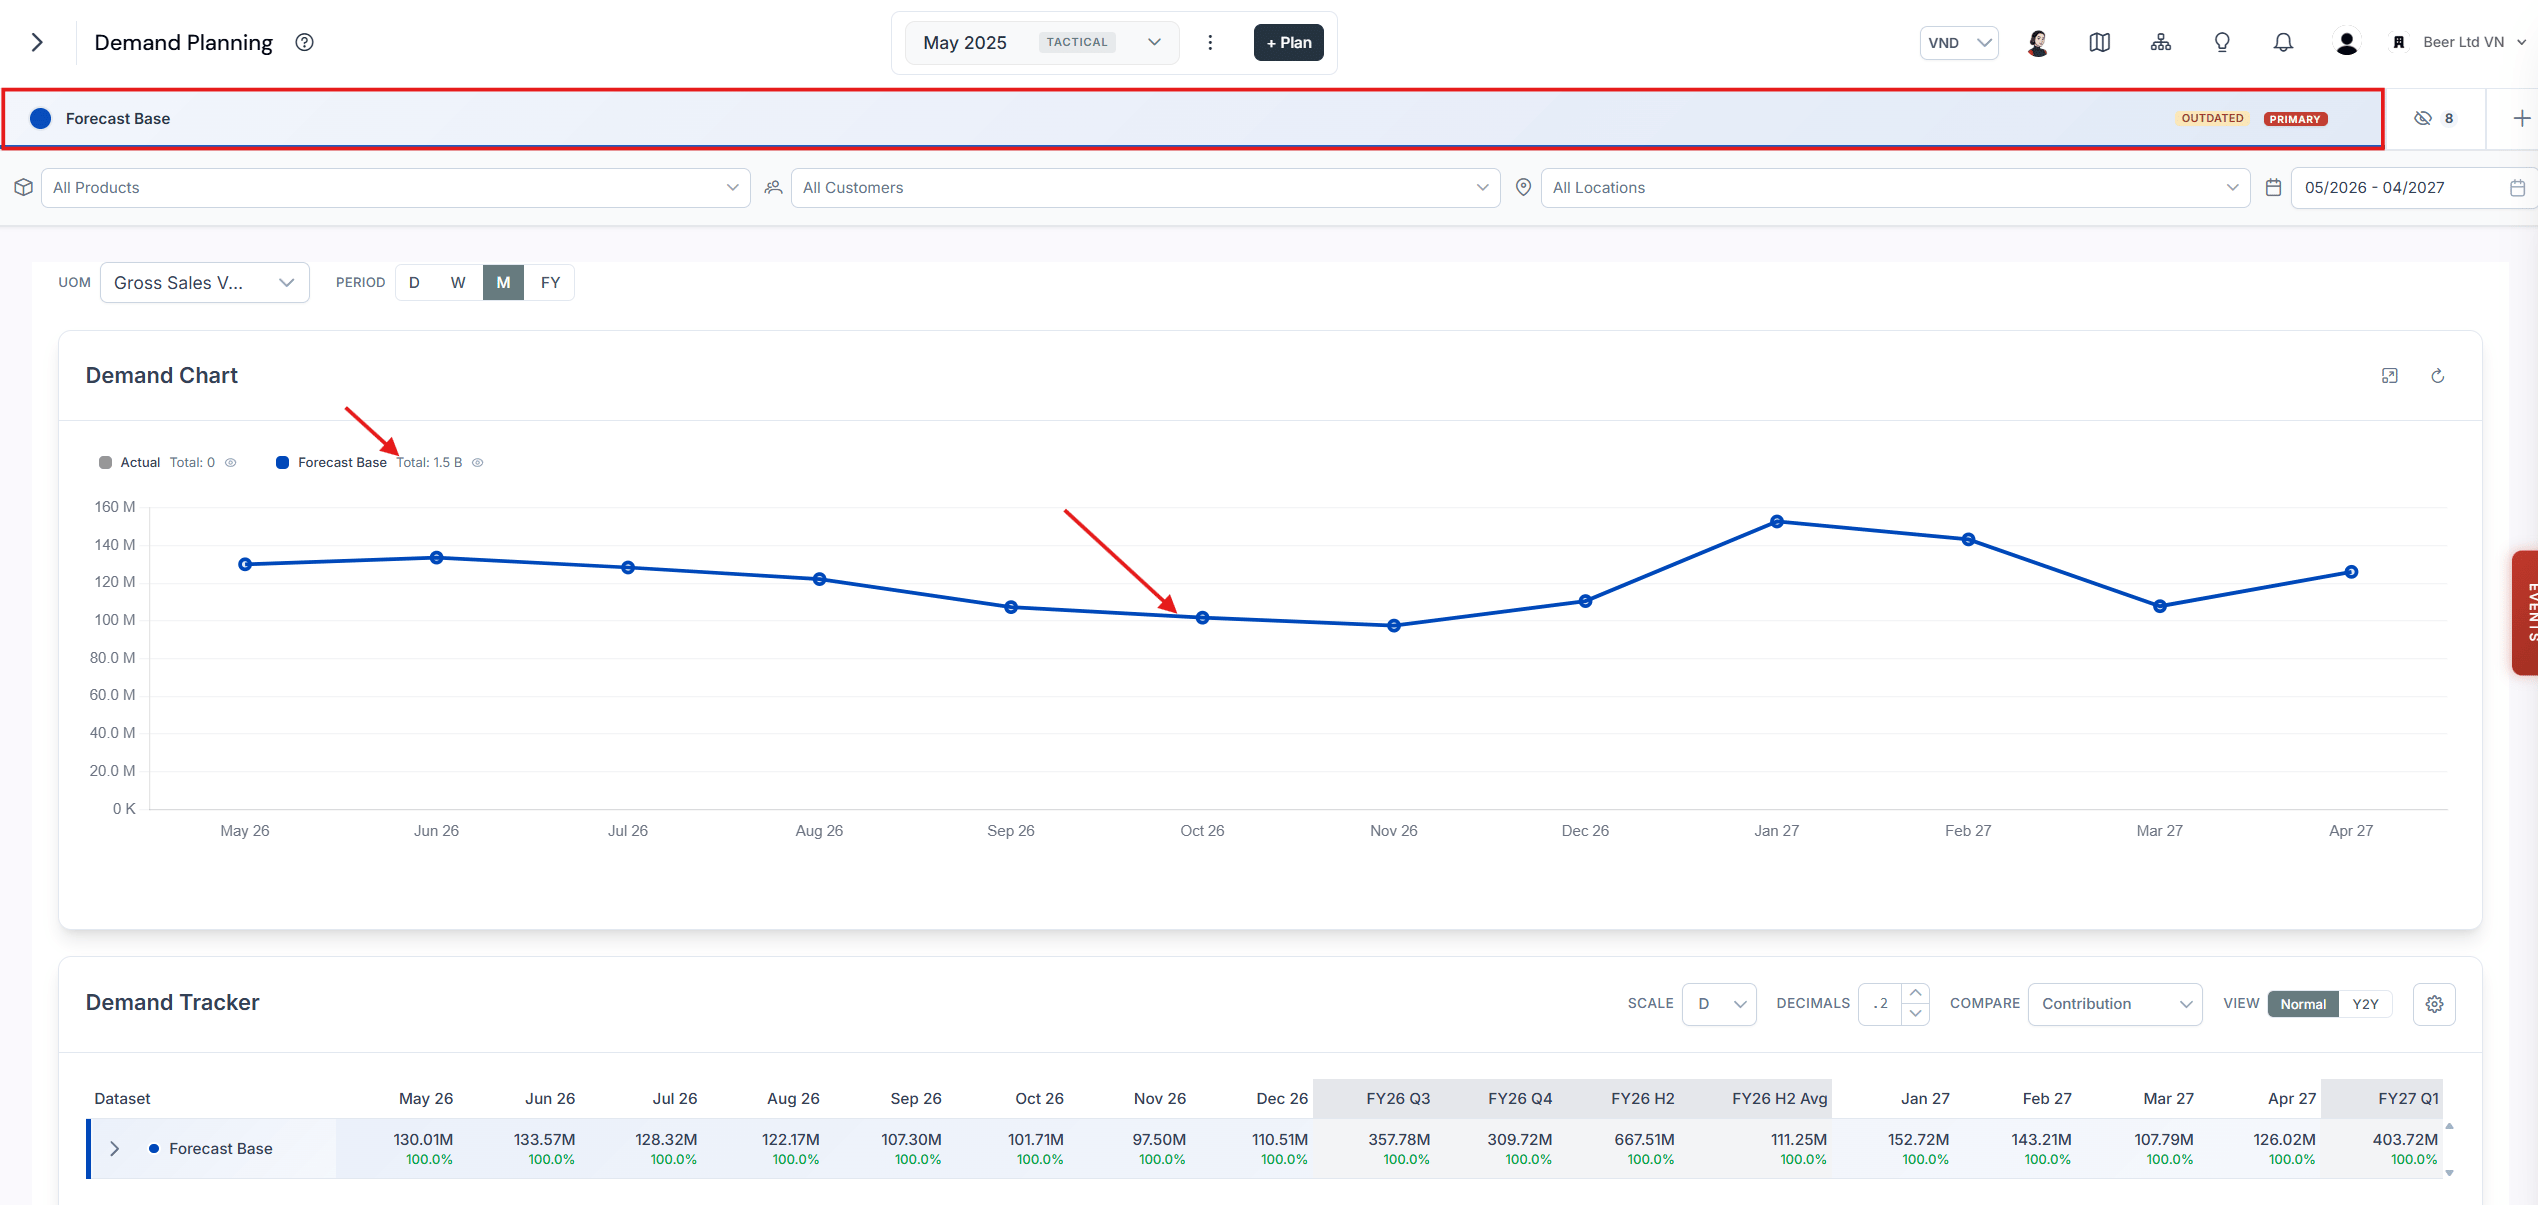
Once the loading completes, you have successfully created your first plan in SIMCEL to forecast your future demand.
The default scenario displayed is the Forecast Base, which shows the unbiased demand projection, free from any event influencing the demand.
Demand chart displaying the Forecast Base scenario, an unbiased demand projection with no events applied

The Forecast Base scenario shown by default in the new plan

The Demand Chart widget shows a line chart with a time series of the demand and the total of the displayed period on the left-hand side for each scenario.

Filtering events in the event timeline

The event timeline provides the same filters as the Demand Planning page. Use them to filter the events based on their impacted segments.
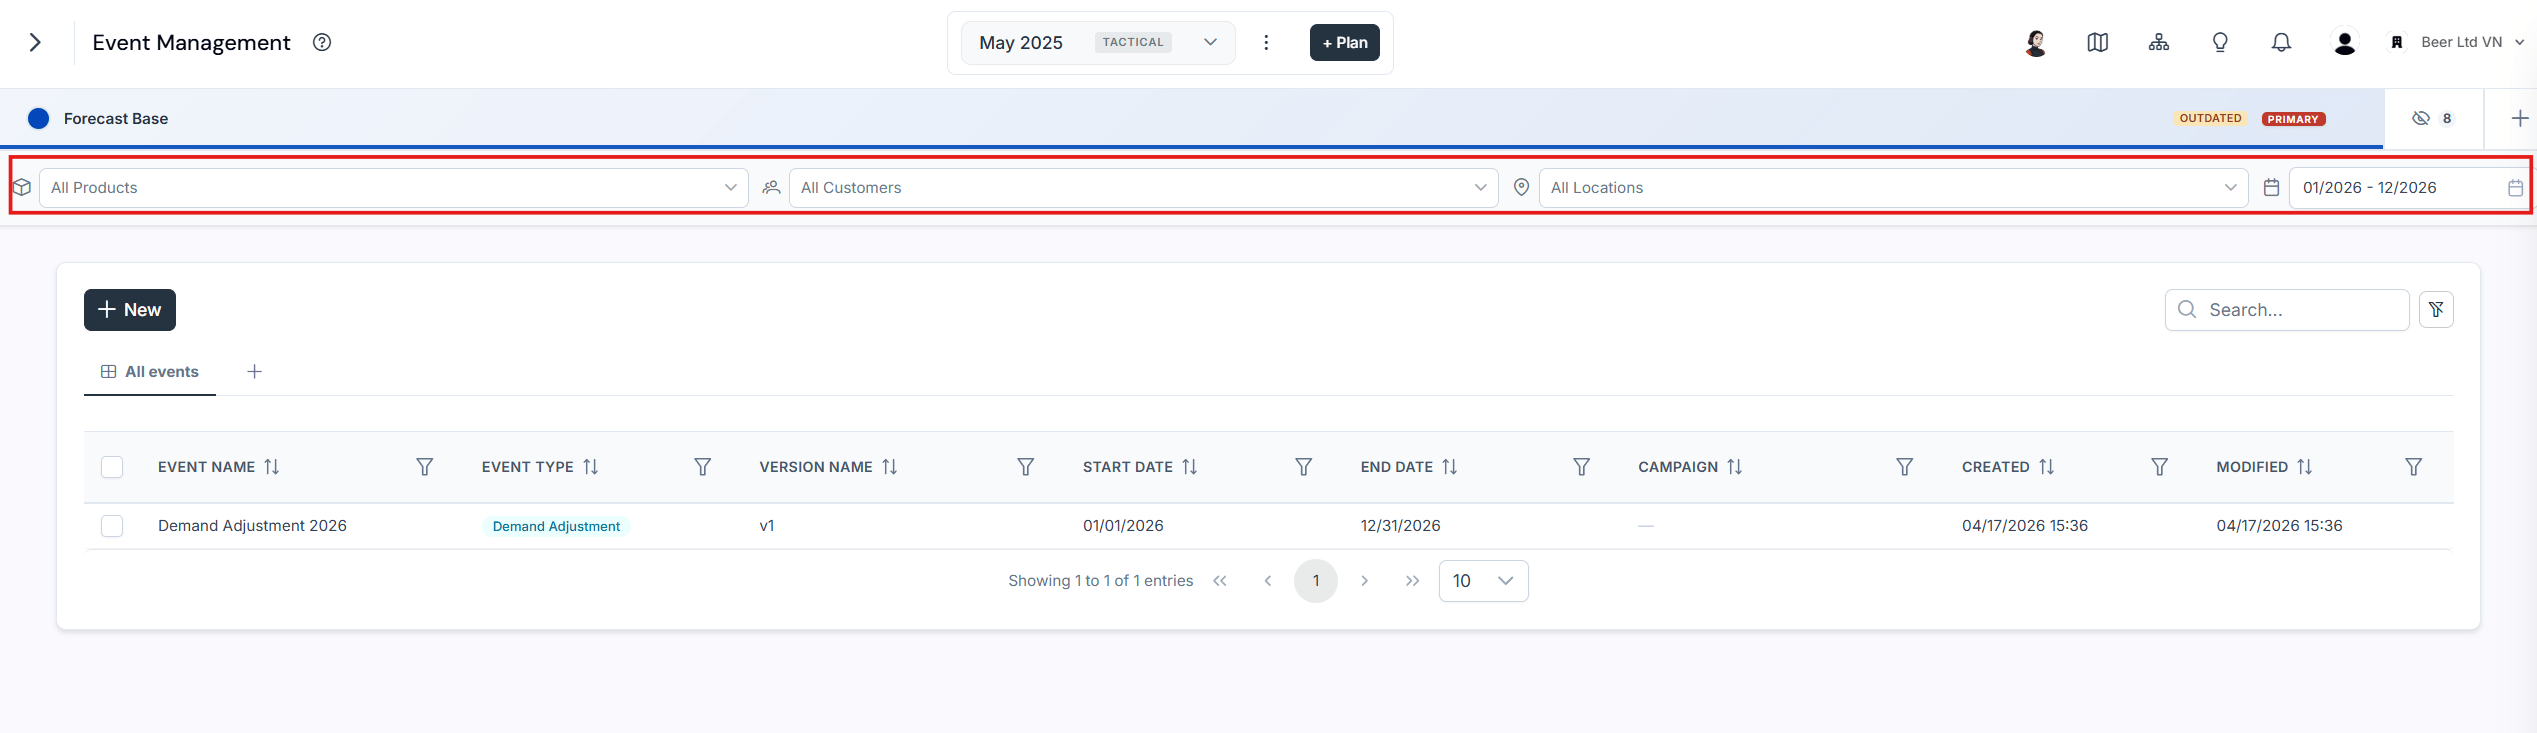
Event timeline with segment filters applied, showing only the events that impact the selected segments

Filtering the event timeline by impacted segment

Create a future demand planning scenario
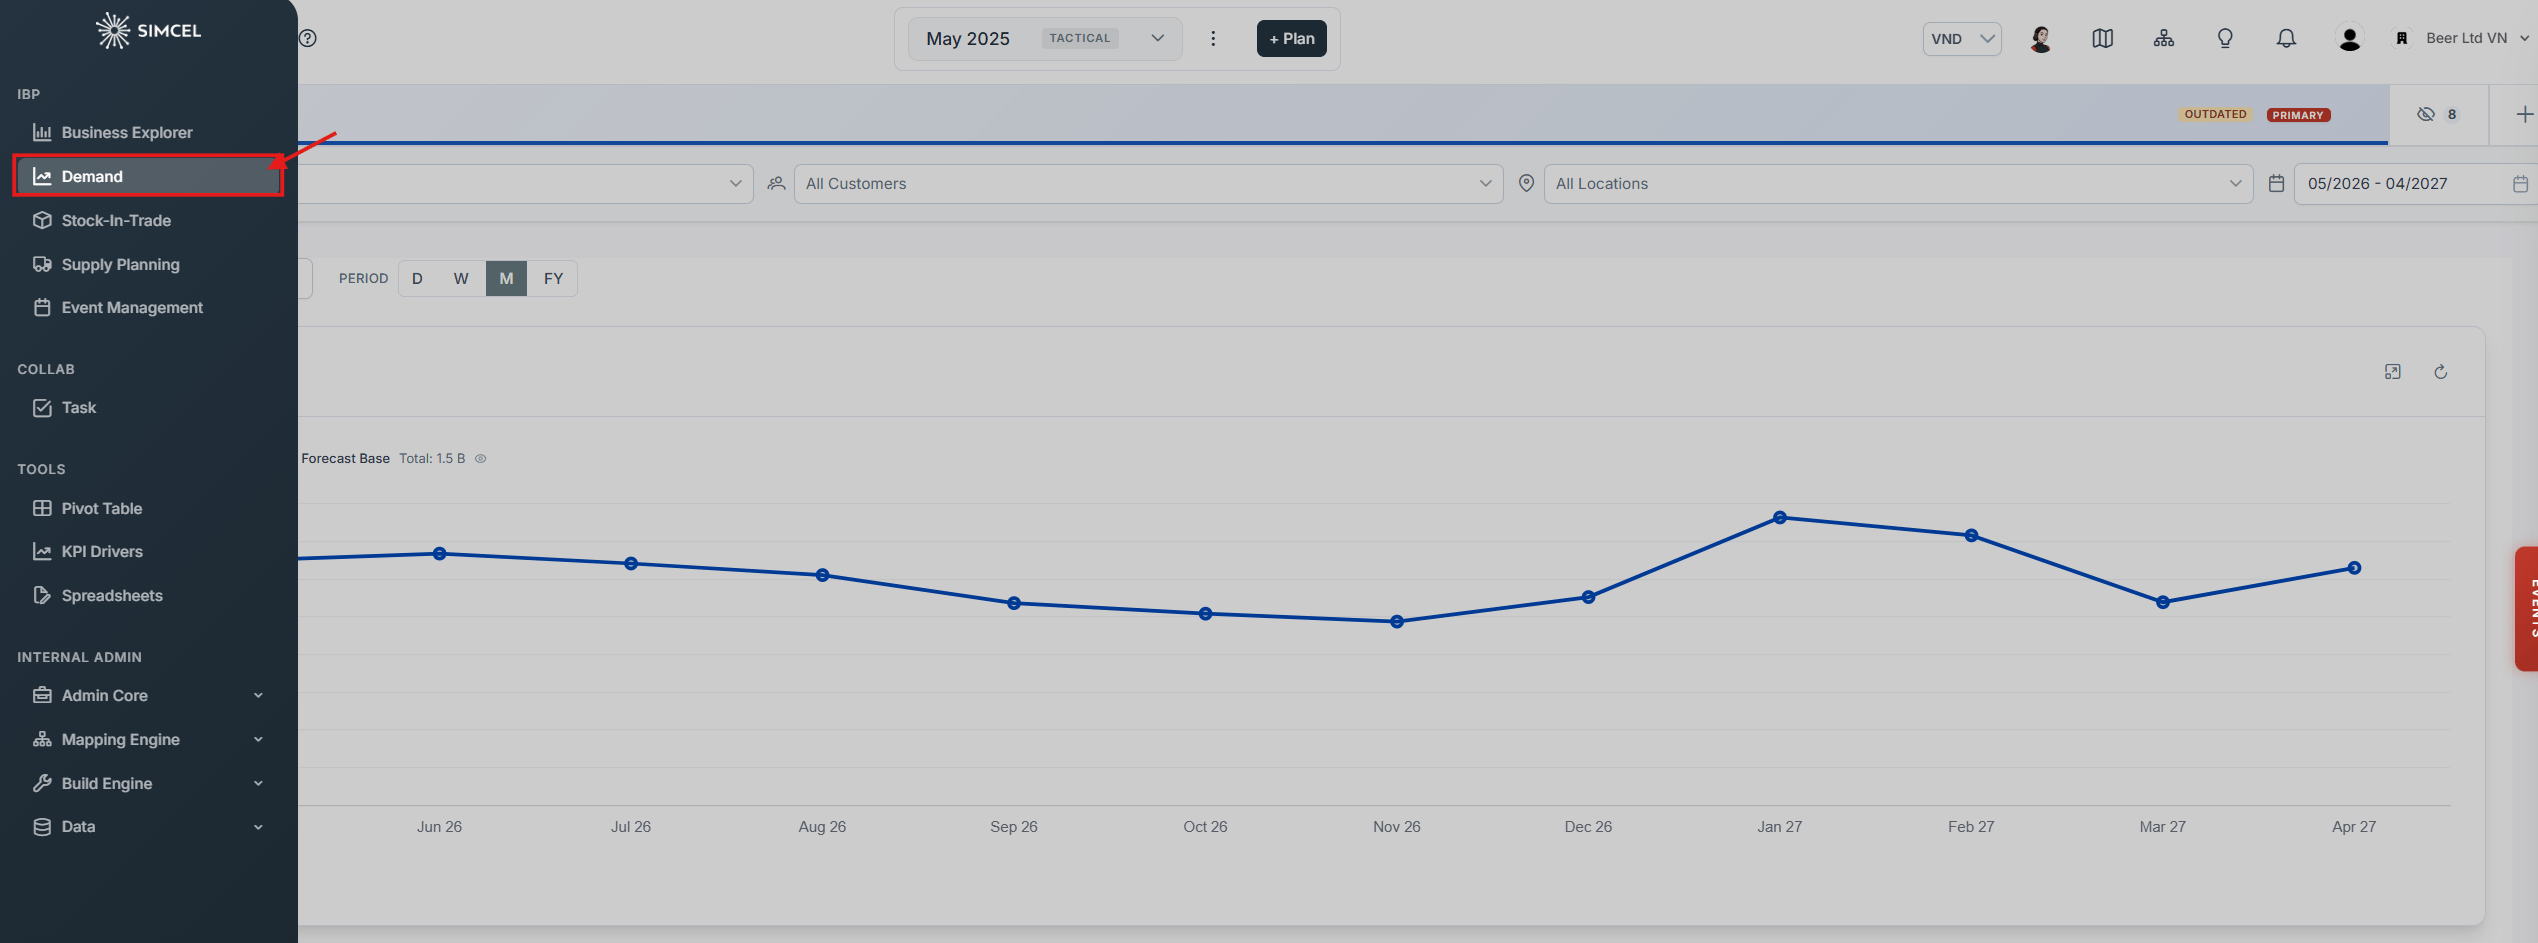
SIMCEL left panel with Event Management selected, where demand planning events are created

Event Management in the left panel

Open the Event Management page in the left panel and create your demand planning events.

Create an event with one impact on sub-segments

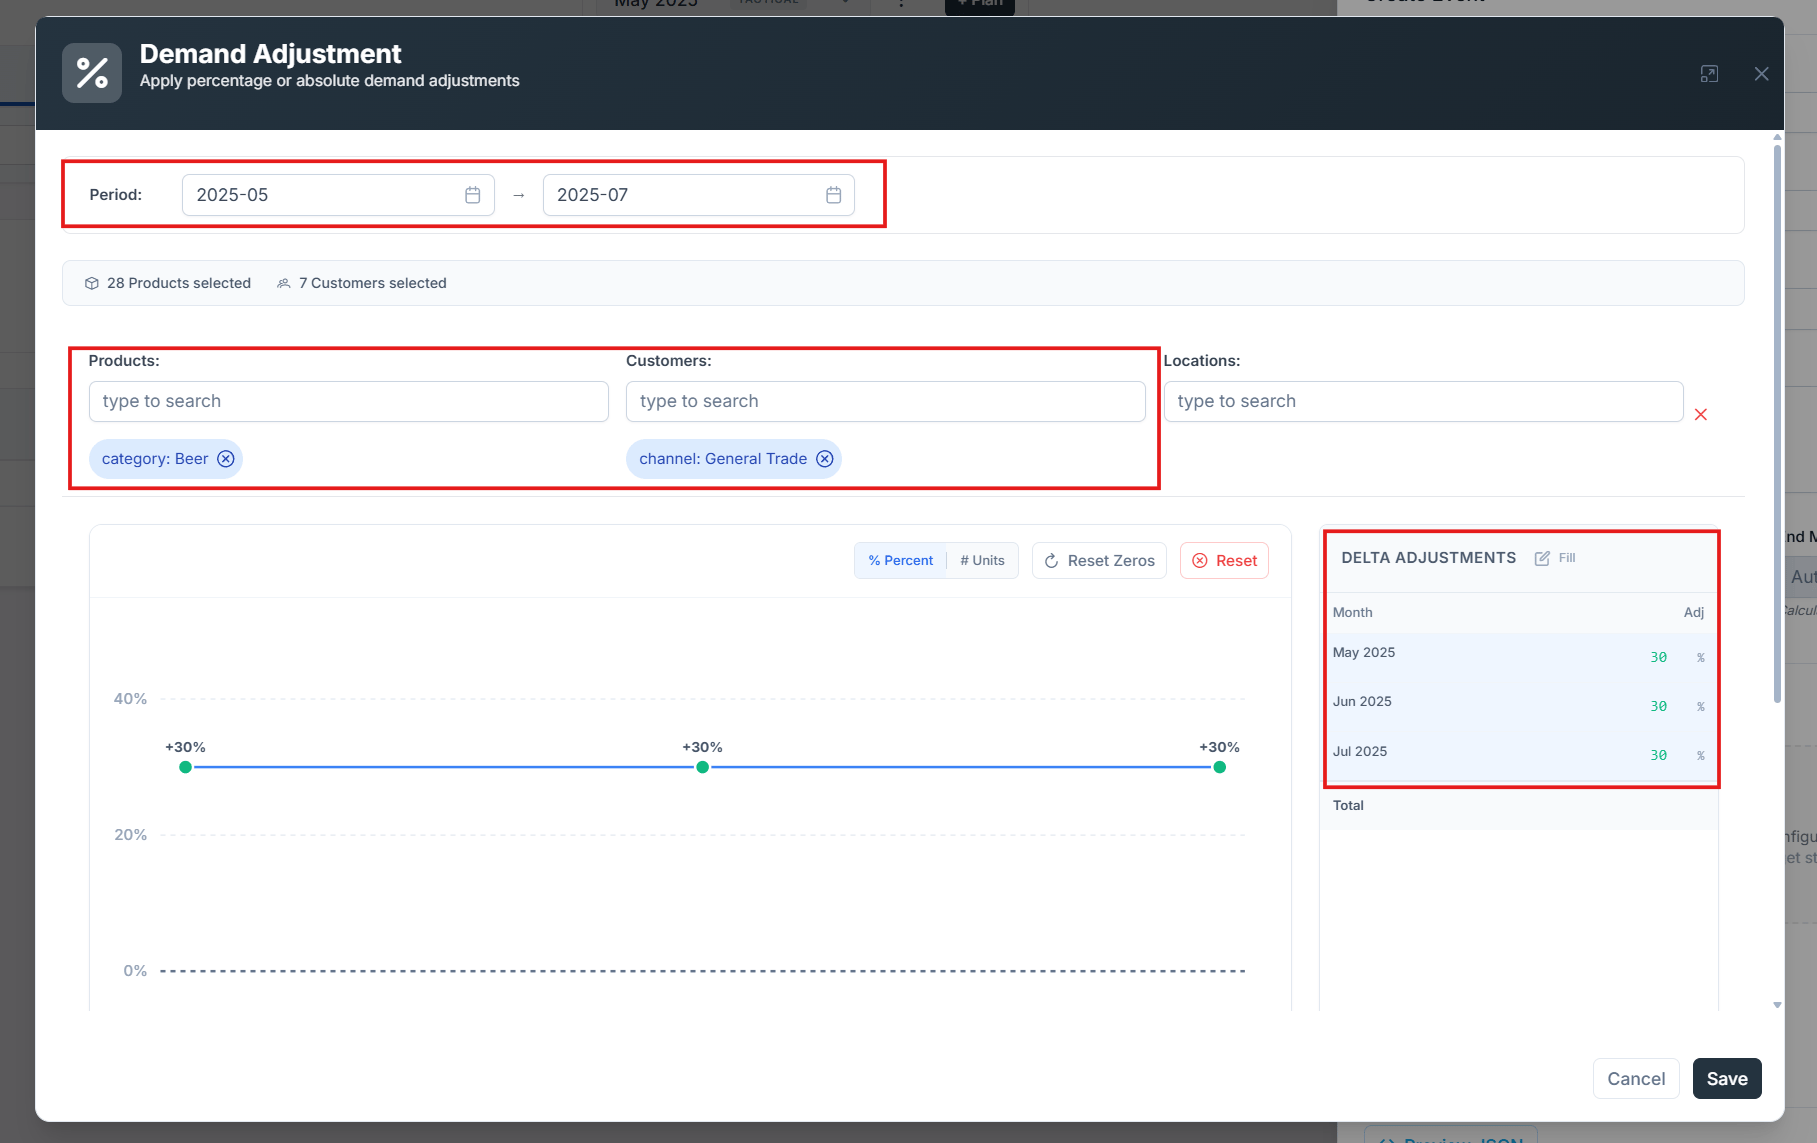
Suppose you want to create an event where the demand of all beer products on the General Trade channel increases by 30% for the Beer category on the General Trade channel.
1

Name the event

Name the new event General Trade Beer Demand Increase.
2

Select the event type

Select Demand Adjustment.
3

Name the version

Name the version V1.
4

Set the period

Select the period from May 2025 to July 2025.
5

Select the product

In the product search box, type and select Beer.
6

Select the customer

In the customer search box, type and select the General Trade channel.
7

Set the impact

In the Adjustment on Demand section, select Increase and set it to 30%.
8

Save

Save the event.
Demand Adjustment event form with the Beer category, the General Trade channel, a period of May to July 2025, and a 30% increase

A demand adjustment event with a single impact

Create an event with multiple impacts on multiple segments

Suppose you want to create an event where the demand for Tiger Beer switches to Hanoi Beer in the Modern Trade channel:
  • Decrease the demand by 15% for the product Tiger Beer on the Modern Trade channel.
  • Increase the demand by 12% for the product Hanoi Beer on the Modern Trade channel.
1

Name the event

Name the new event Demand-Switch, select Demand Adjustment as the event type, and name the version V1.
2

Add the first affected segment

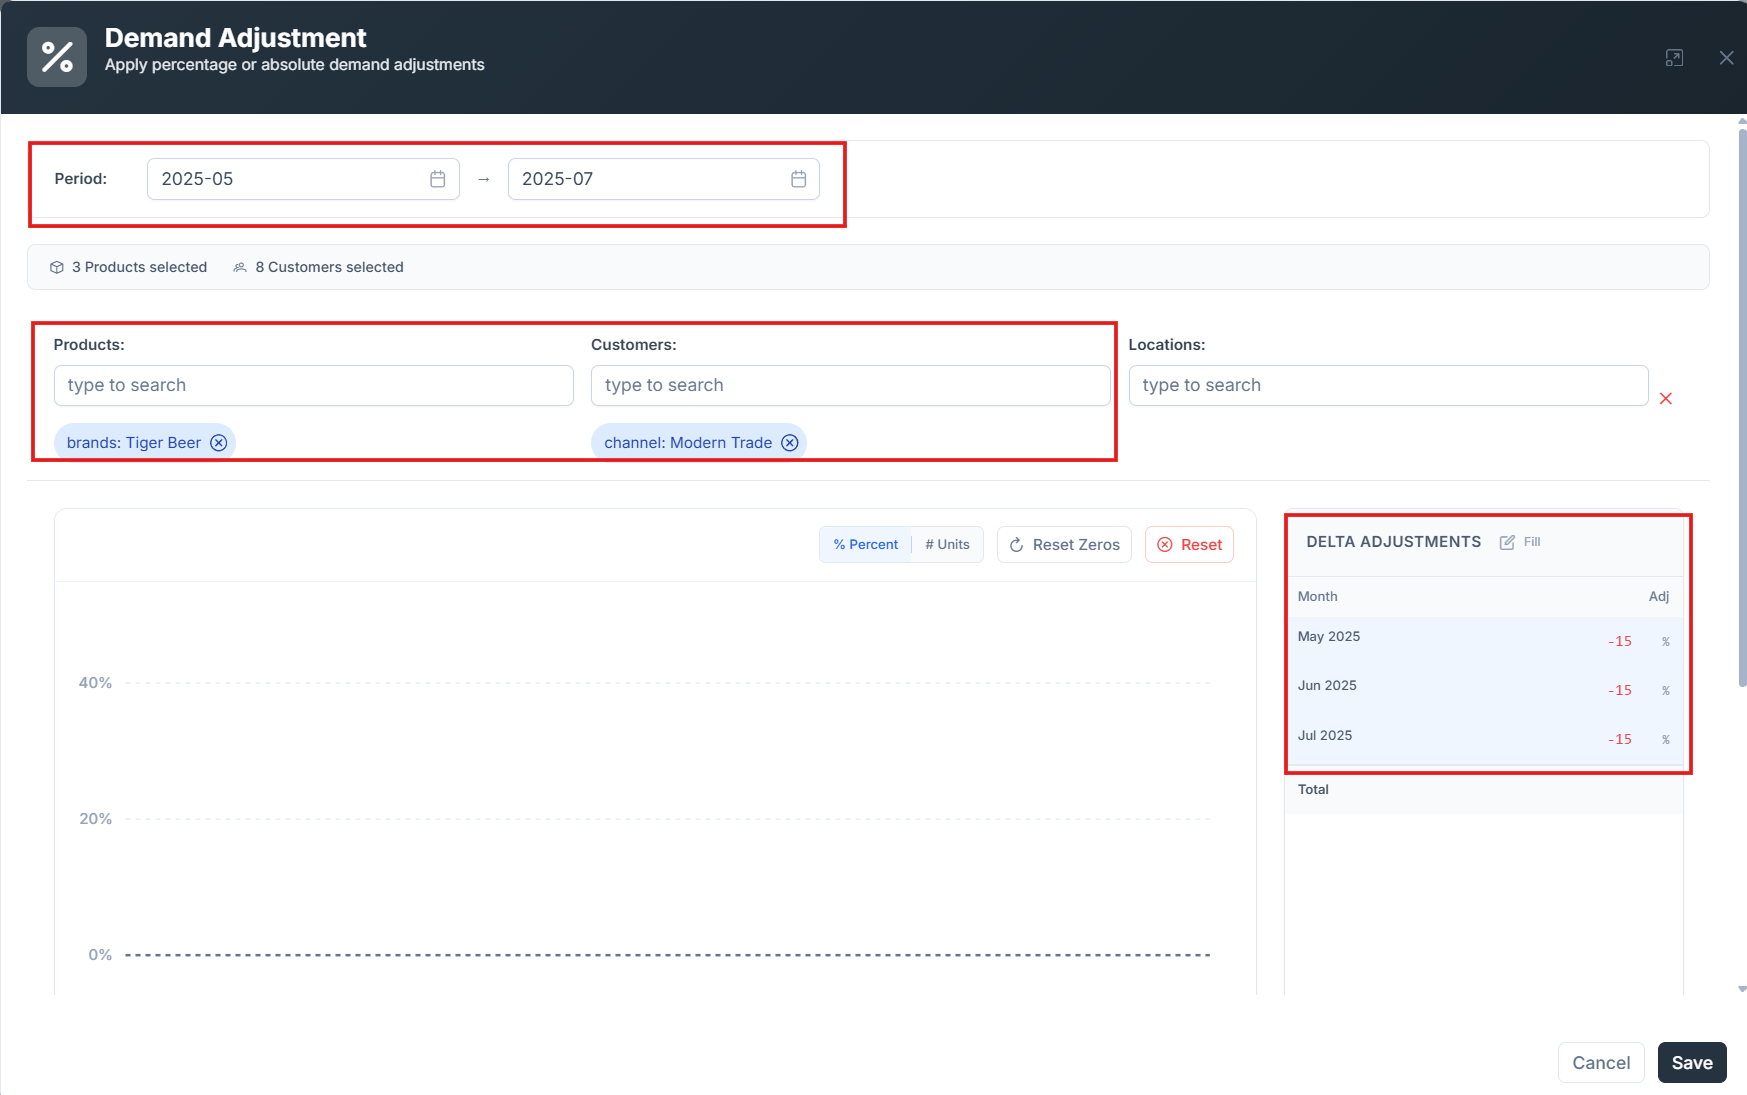
In the product search box, type and select Tiger Beer. In the customer search box, type and select the Modern Trade channel. In the Delta Adjustments section, set the value to -15%. Select the period from May 2025 to Jul 2025, then click Save.
3

Add the second affected segment

Click Add Impact. In the new box, type and select Hanoi Beer in the product search box, and the Modern Trade channel in the customer search box. In the Delta Adjustment section, set the value to 12%, and select the period from May 2025 to Jul 2025.
4

Save the event

Save the event.
Demand Adjustment event form with the first impact configured for Tiger Beer on the Modern Trade channel at -15% from May to July 2025

The first affected segment: Tiger Beer on Modern Trade, -15%
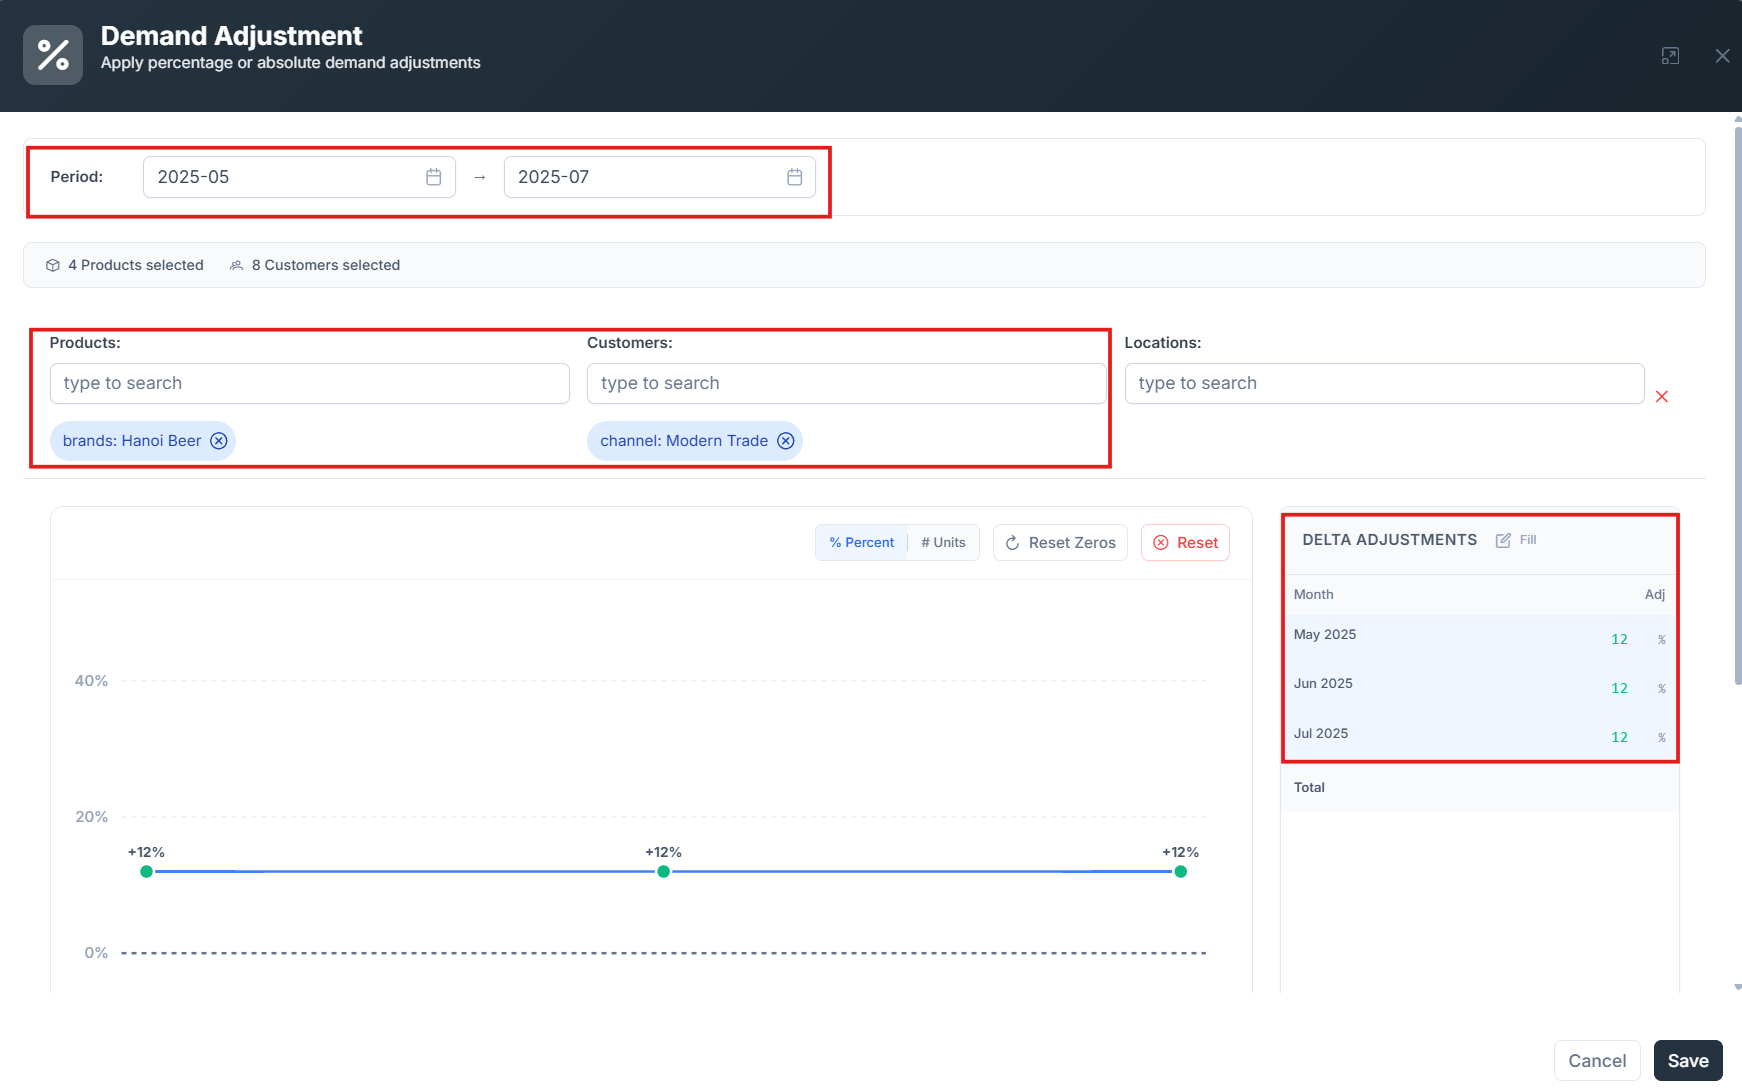
Demand Adjustment event form with a second impact box added for Hanoi Beer on the Modern Trade channel at 12% from May to July 2025

The second affected segment added with Add Impact: Hanoi Beer on Modern Trade, +12%
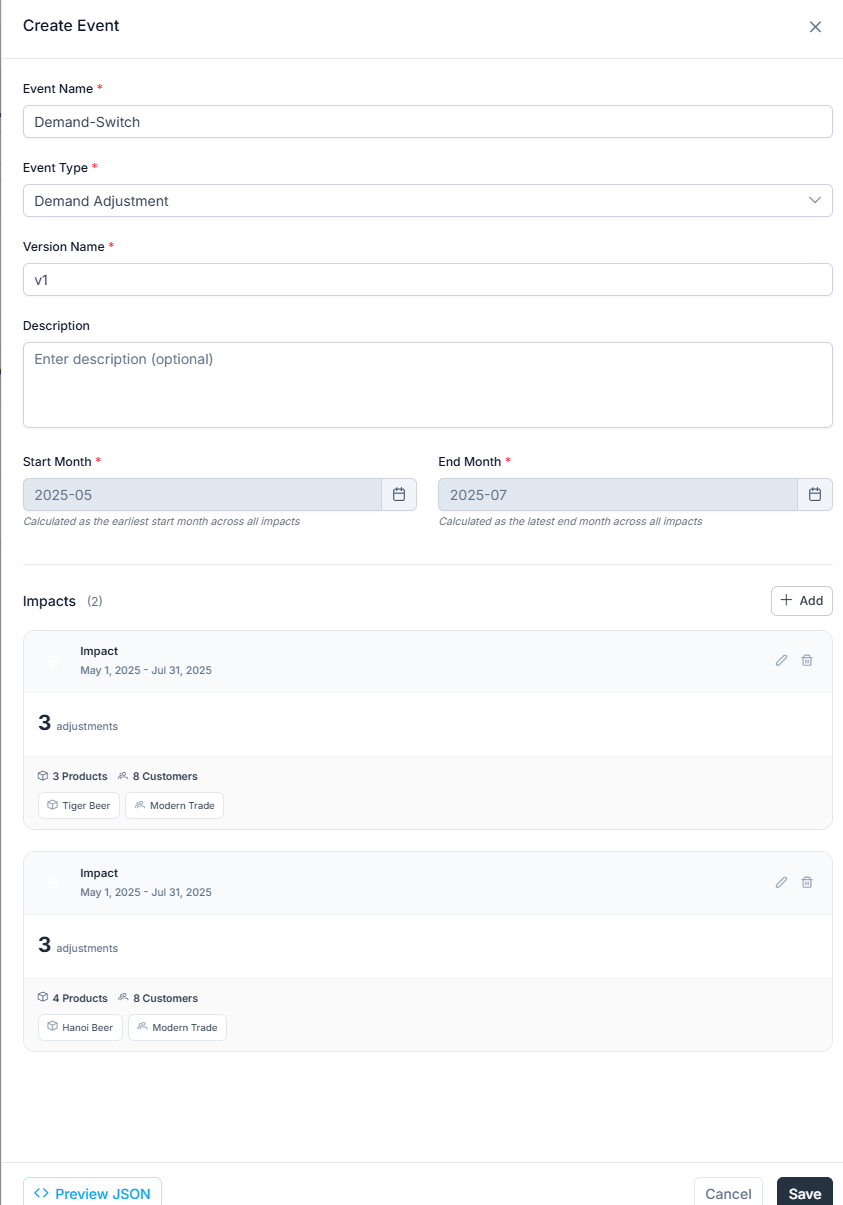
Event Management page showing the saved Demand-Switch event with both segment impacts listed

The Demand-Switch event saved with both impacts

Create a scenario with one or multiple trade and marketing events

Add the events above to a new scenario called Scenario 2 Events. Go back to the Demand Planning page, click Add Scenario, then click Create a new Scenario.
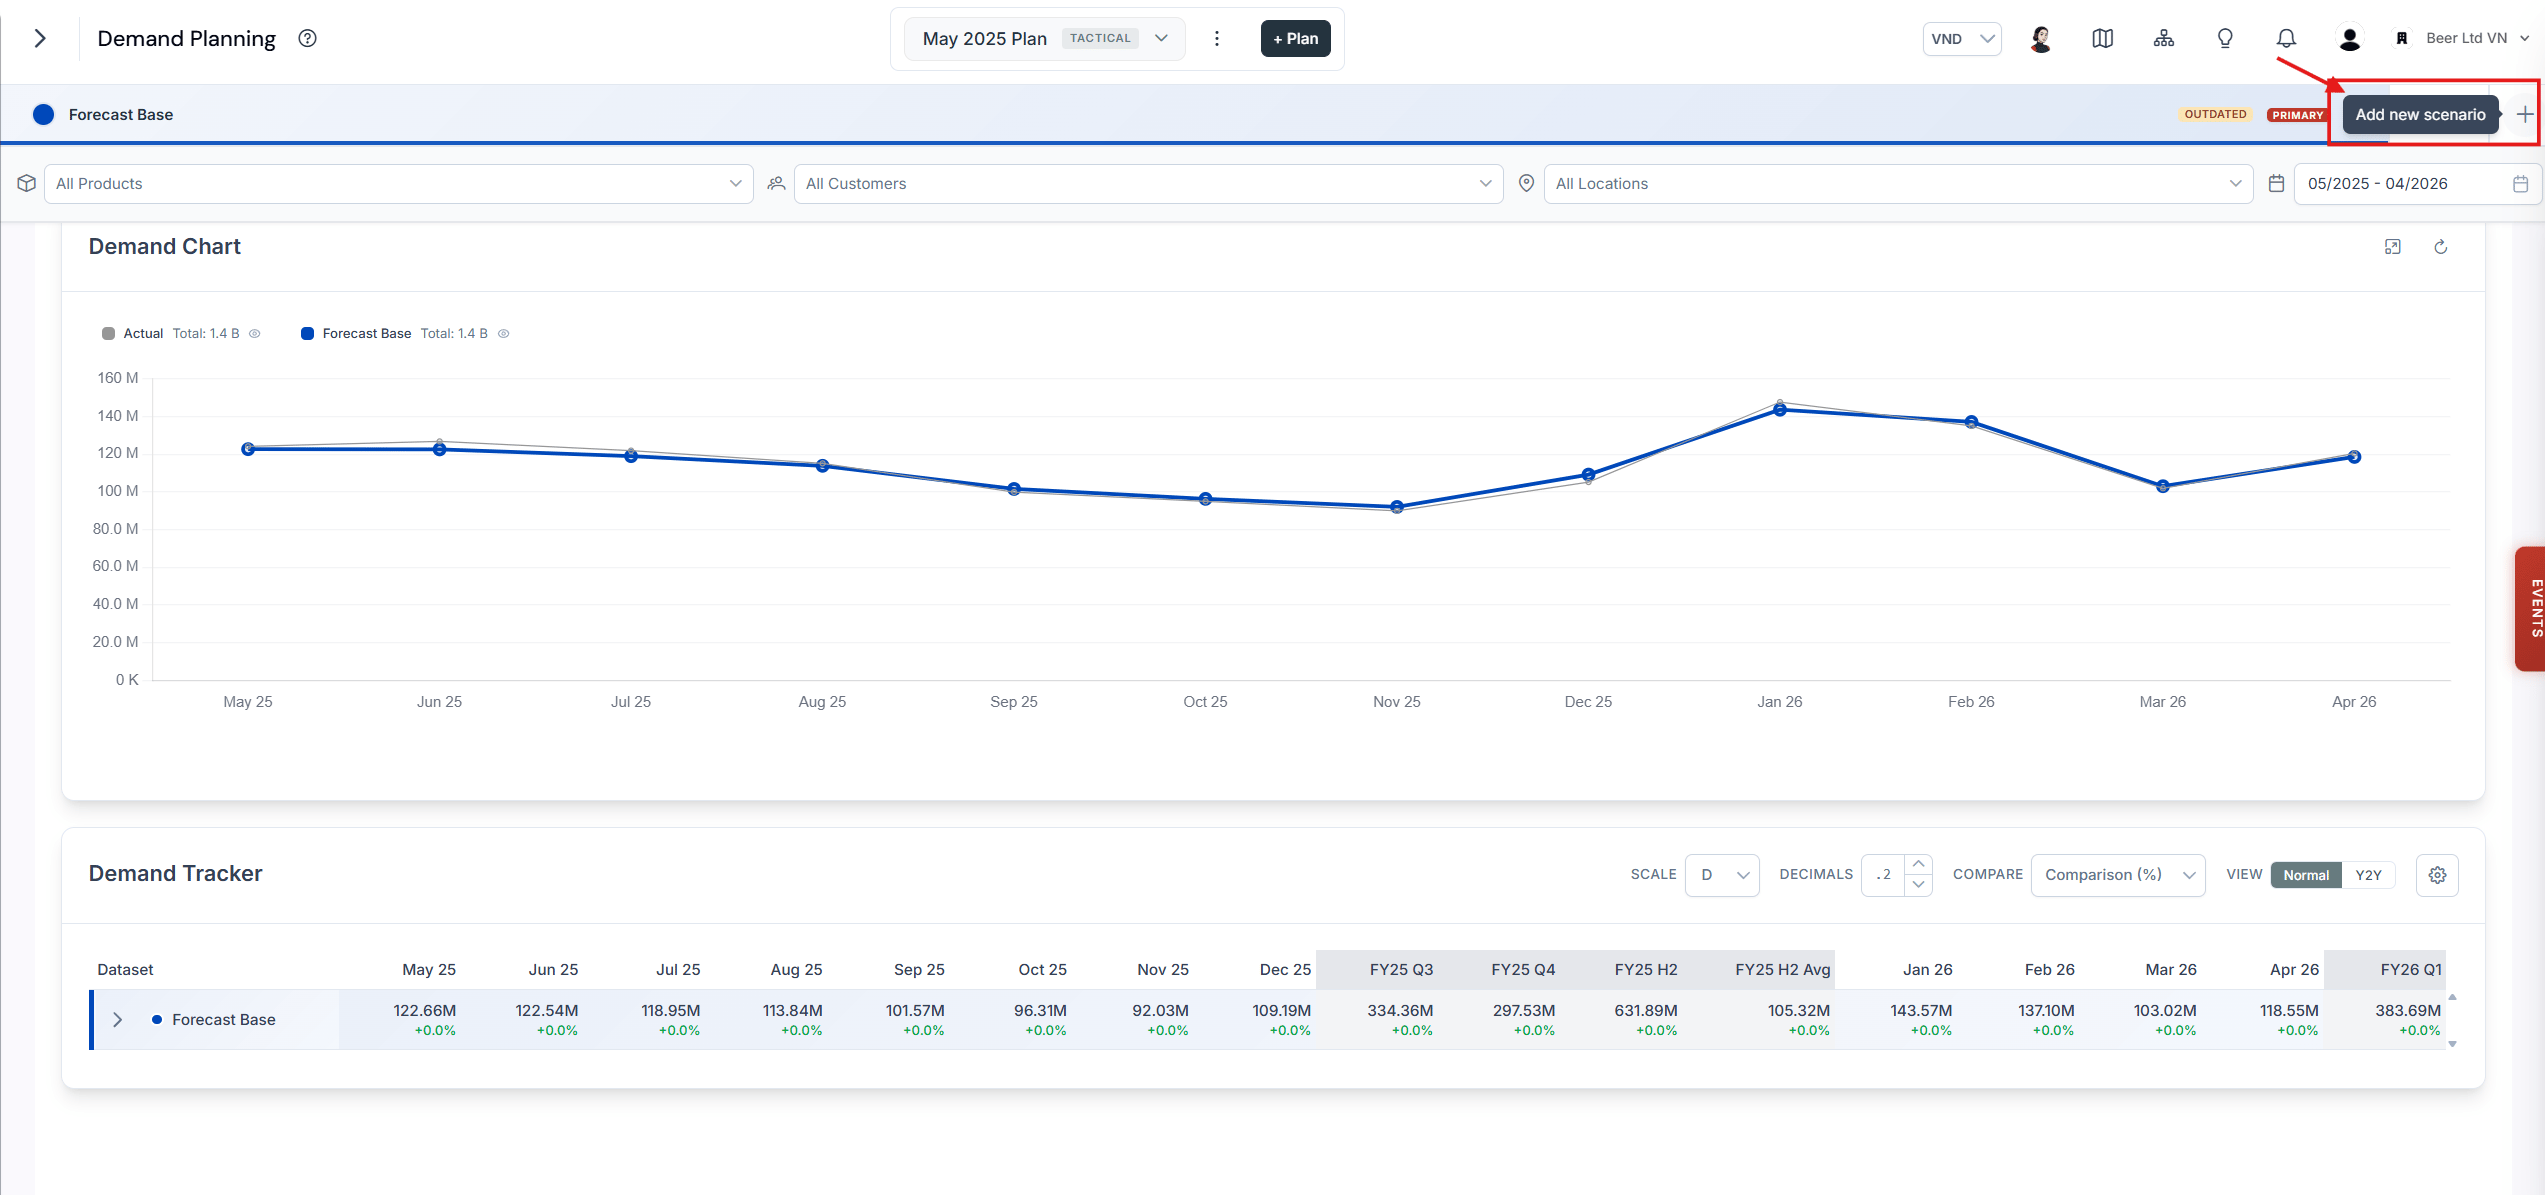
Demand Planning page with the Add Scenario control open and the Create a new Scenario option highlighted

Creating a new scenario from the Demand Planning page

1

Name the scenario

Set the name of the scenario to Scenario 2 Events.
2

Select the events

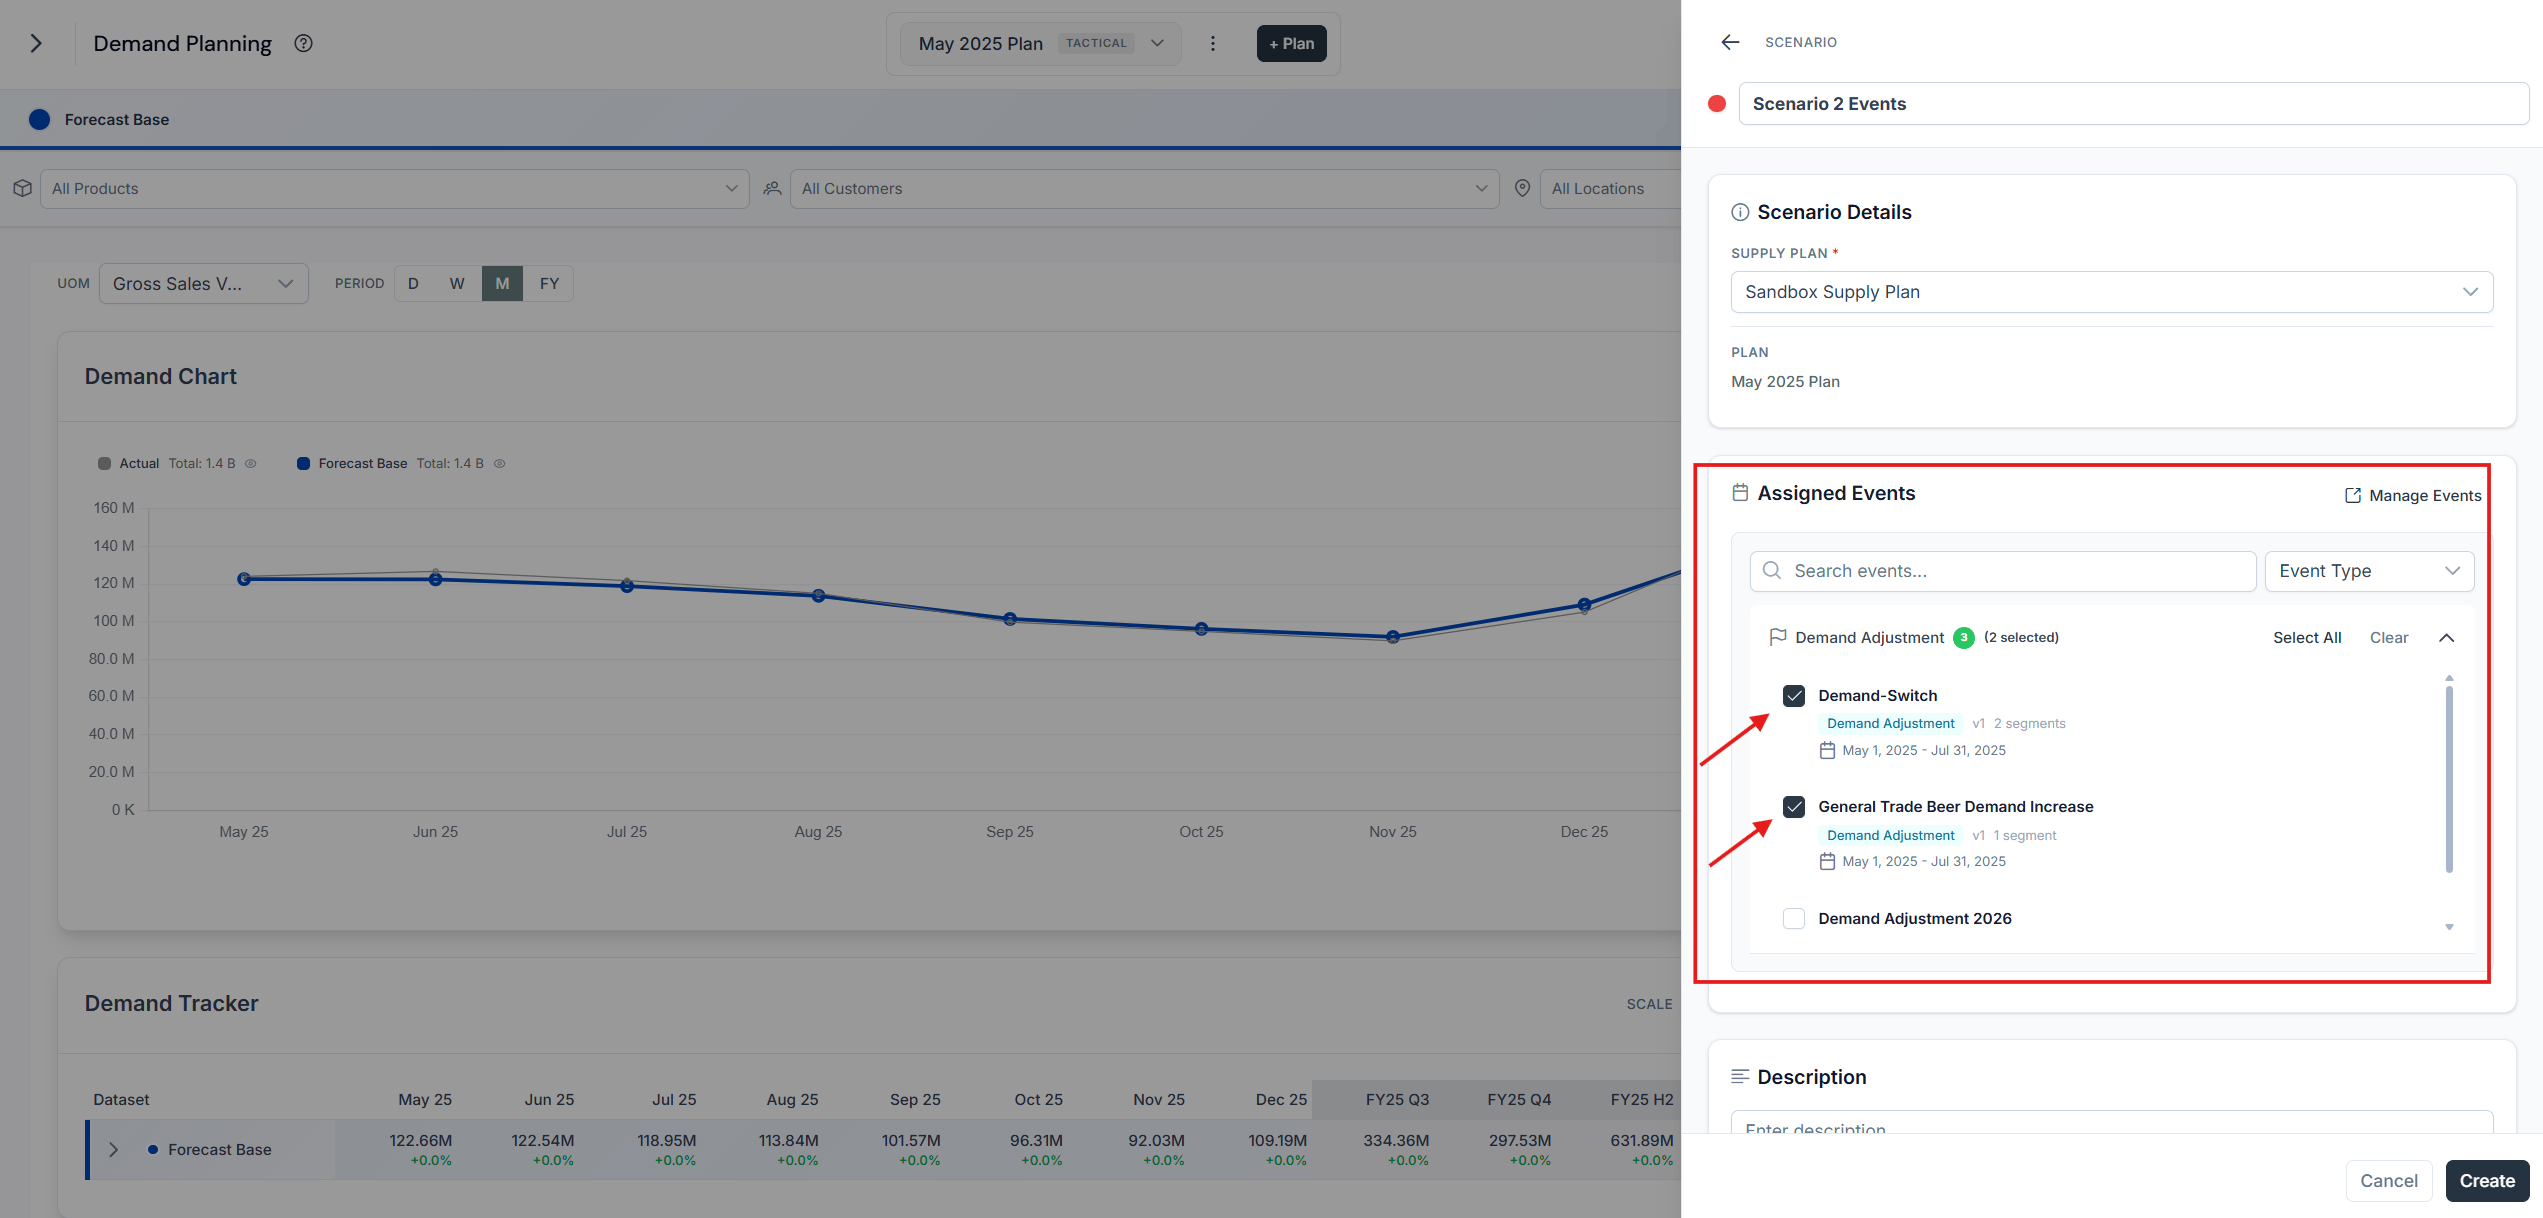
Select the event versions General Trade Beer Demand Increase and Demand-Switch.
3

Save

Click Save.
New scenario dialog named Scenario 2 Events with the General Trade Beer Demand Increase and Demand-Switch event versions selected

Assigning both events to the new scenario
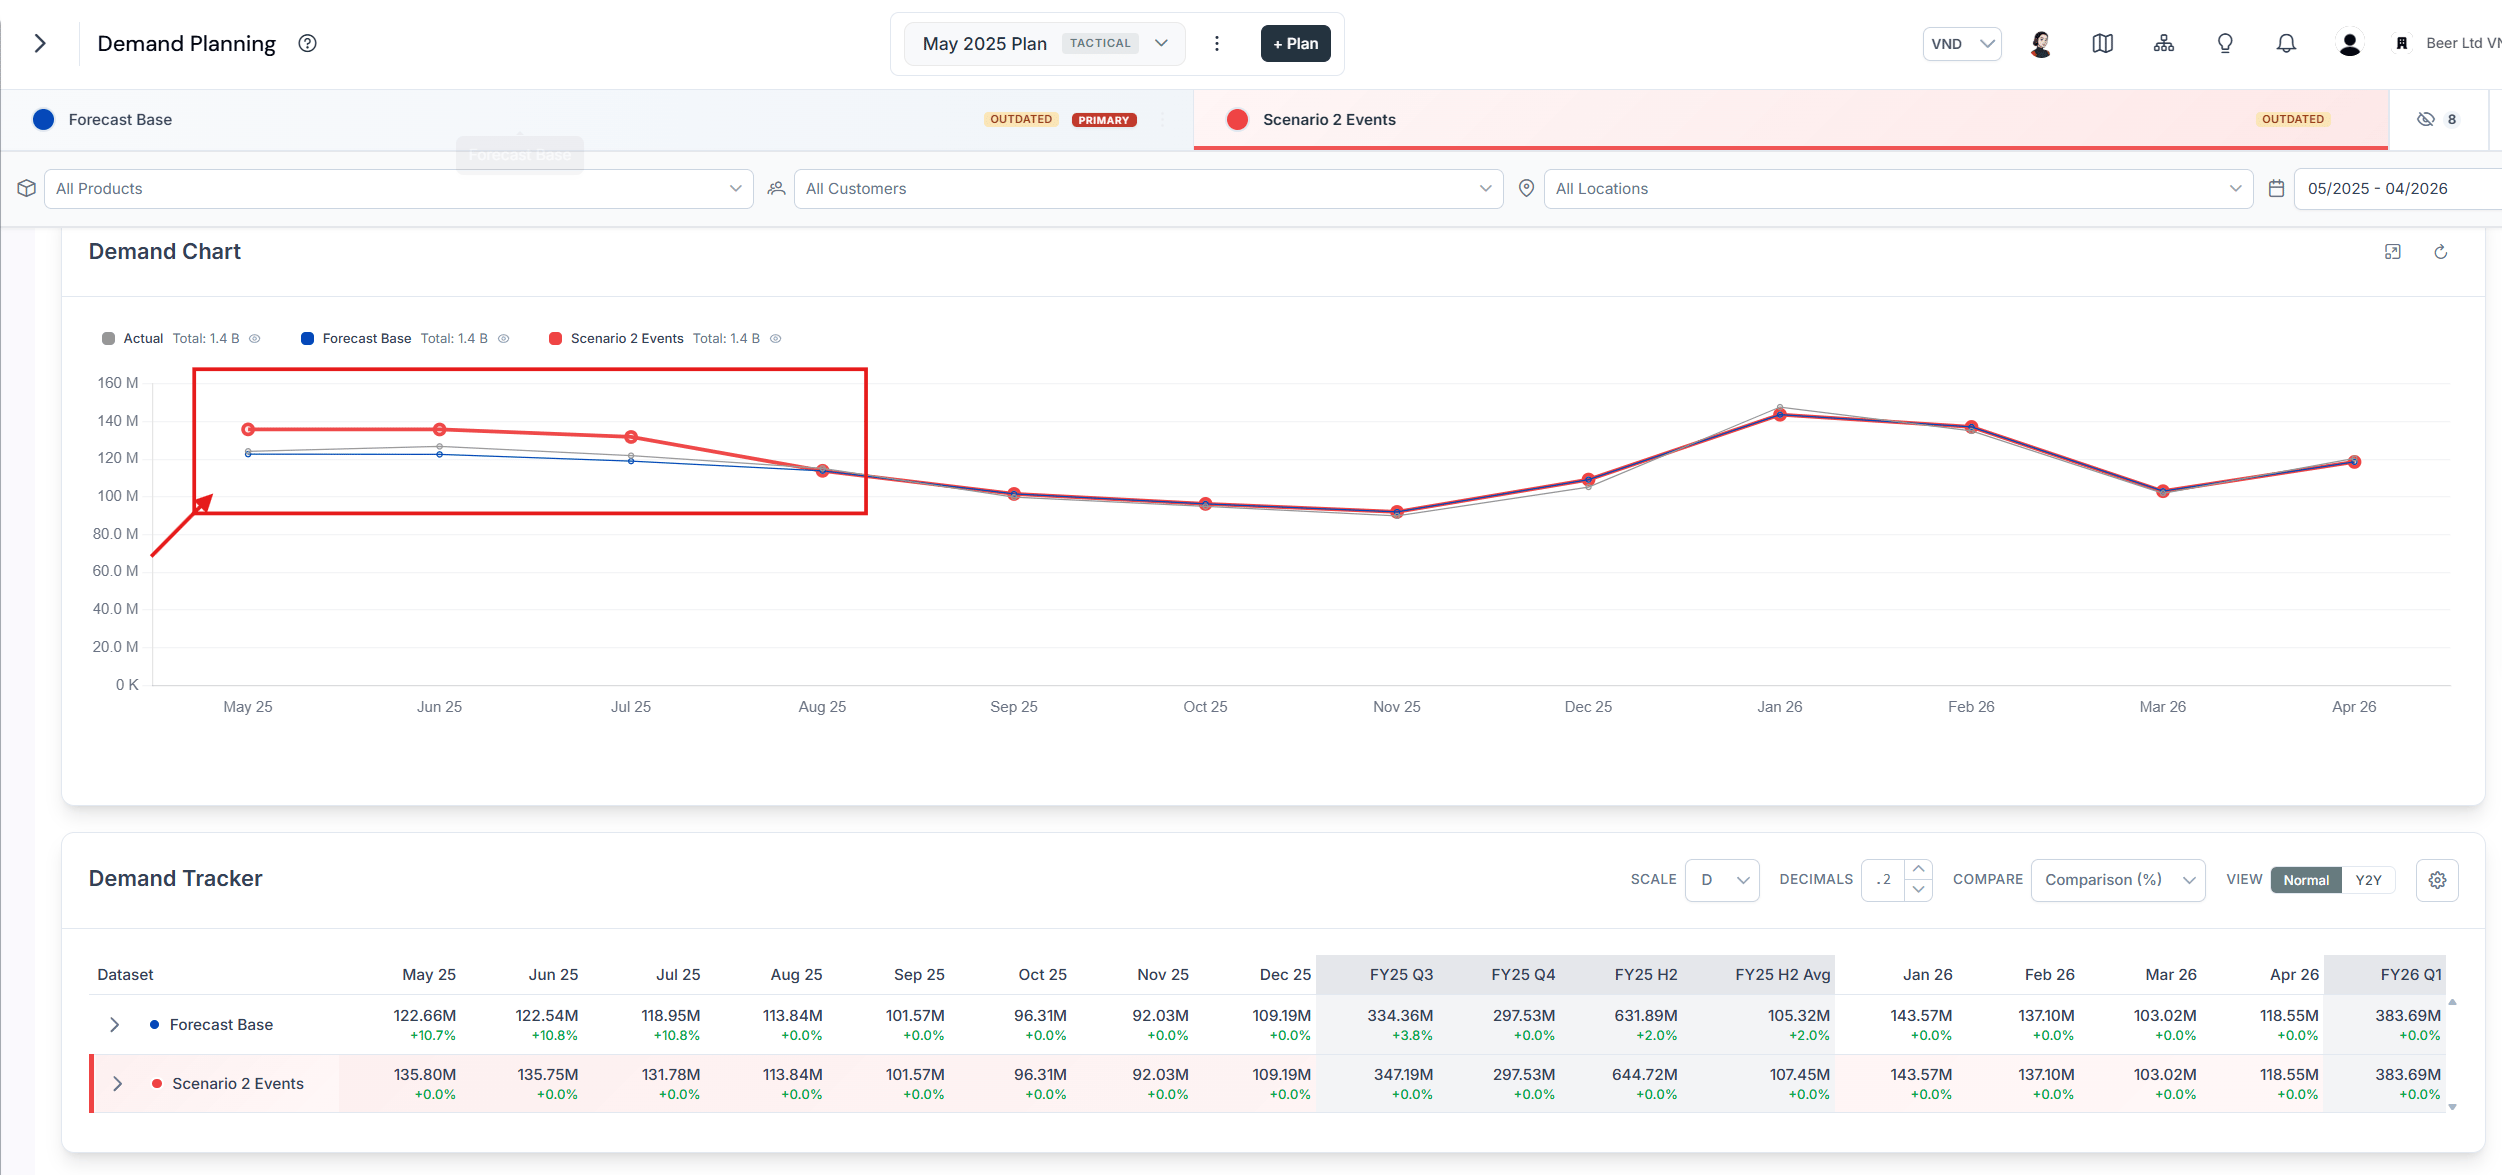
The events are now reflected in the scenario’s demand.
Demand chart showing the Scenario 2 Events line diverging from Forecast Base where the assigned events take effect

The scenario demand reflecting the assigned events

Select a scenario to be the execution plan
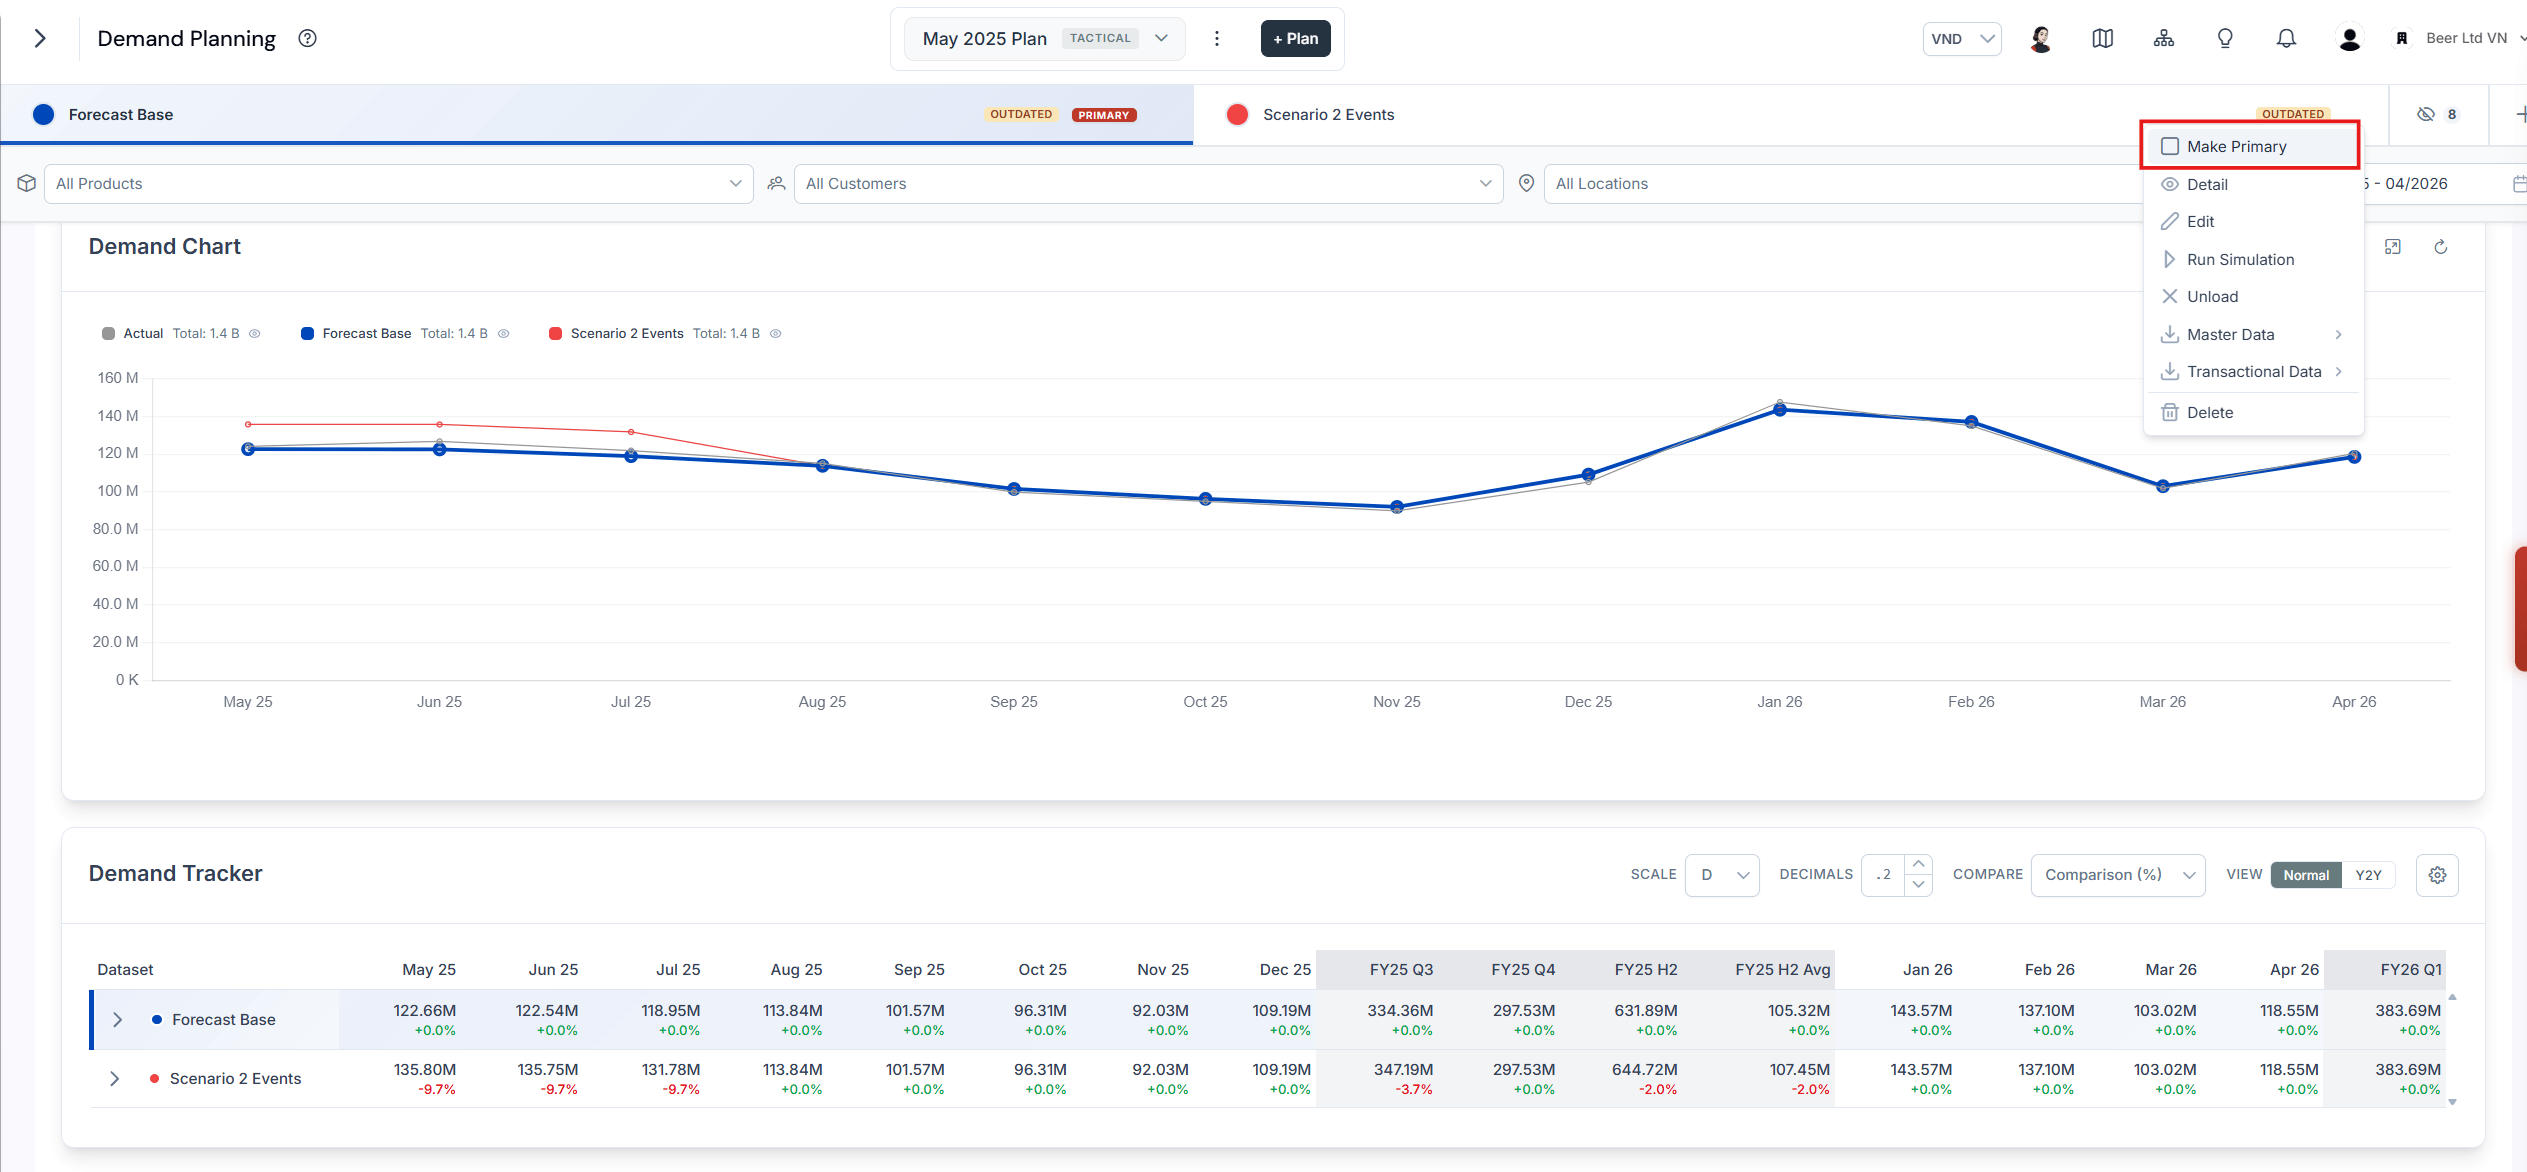
This section guides you through converting a scenario of your choice into a plan that is used as the reference for the entire business.
Click the three dots menu icon and select Make Primary.
Scenario three dots menu open with the Make Primary option highlighted

The Make Primary option in the scenario menu

Once you have successfully selected the scenario as the execution plan, a Primary tag appears.
Scenario list showing the selected scenario labelled with a Primary tag, marking it as the execution plan

The Primary tag on the selected execution plan